Tuesday, June 24, 2014

Crunchy Garlic Shrimp Fried Rice

Have you ever "Cooked from the Hip" with whatever you happen to have left in your fridge or freezer?  That's what I did yesterday, and it turned out well!  My only issue is, I failed to take any pictures of the process... What to do, what to do?  I decided the recipe was good enough to share without photos, so please forgive me. I did take this one:


You Will Need:
  • 1lb of jumbo, uncooked shrimp (thawed out, cleaned, and rinsed)
  • 4 Servings of white rice (that's 1 Cup of uncooked white rice, or a quart of leftover white rice from Chinese take-out)
  • 1 stick of butter
  • 1 small onion, diced
  • 2 Tbsp Bacon Fat
  • A/P Flour (3/4 cup or so)
  • 4 Tbsp minced garlic
  • Tony Chachere's Creole Seasoning
  • Soy Sauce
  • One Large Egg

Before you start

Place one whole stick of butter in a saute pan, add the garlic, and turn the heat to "LOW."  Walk away while this slowly melts, and then sweats the garlic.  Give this at least 20 minutes to work.

For the Rice

Cook the rice in a non-stick pot and when it's done and still hot, add the onion and the bacon fat and stir it all up over medium-high heat.  Check it and stir it some more, every 5 minutes or so.  Add a generous shake of soy sauce.  Stir.  When you start to see some of the rice turning a golden brown and getting just a little bit "crunchy," add the egg and stir it in.  Cover, reduce the heat to "Low" and turn your attention to the Shrimp.

For the Shrimp

Put all of the shrimp into a bowl and drizzle a very small amount of olive oil over them.  Shake on a good helping of Tony's creole seasoning and stir them all in the bowl.  Drain well, and dump the shrimp into a zip-top bag.  Add the flour.  Shake, shake, shake!  WAIT, zip the bag closed first, THEN shake, shake, shake (that was close)!  Turn up the heat on the garlic/butter mix in the saute pan to Med/High.  Wait until the butter starts to bubble and pop, then gently take the shrimp out of the bag, one at a time, and lay them into the garlic mix.  Let them saute for two minutes, then flip them over.

Assemble the Dish

Pour the rice out onto a large platter and spread it around.  Use a slotted spatula to gently take the shrimp out of the pan and arrange them over the rice.  Drizzle what's left of the garlic butter "fond" in the pan, over the platter and garnish with some chopped green onions and some Sriracha sauce!

Thursday, June 12, 2014

Sweet Rhubarb and Sour Cream Pie!

If you ask a Minnesotan, "Why do you live there, in the frozen tundra?"  He'll likely tell you that, "The Spring, Summer, and Fall are fantastic!"  It's early Summer here in the Great North and that means several things:
  • 72 degree days
  • 60 degree overnights
  • Windows open
  • Flowers everywhere
  • Fresh Asparagus
  • Fresh RHUBARB!

I love Rhubarb.  I used to pick it and eat it straight out of my grandmother's garden (she hated that).  While I love it raw and sour, most people like it sweet and at this time of year, you'll see a ton of rhubarb crisps, crumbles, and strudels at your church socials.  I took it up a notch!  "Is it possible," I wondered, "to bake rhubarb into a sweet cream pie?  and to put the crisp, crumble, or strudel on TOP?"

It is.......


You Will Need:
  • 1 (9 inch) Frozen unbaked pie crust
  • 3 1/2 Cups chopped fresh rhubarb (1/4" dice)
  • 1 Egg
  • 1 1/2 cups white sugar
  • 1 Cup sour cream
  • 1/3 Cup all-purpose flour (for the pie), plus another 1/2 Cup of all-purpose flour (topping)
  • 1/2 Cup brown sugar
  • 1/4 Cup butter, melted but not "hot"
Preheat your oven to 450!!  Now, pour yourself a large, cold, summer-time, adult beverage for courage and fortification.  Keep it handy...

Start with your frozen pie crust.  By the way, not all frozen pie crusts are equal!  Pillsbury crusts always bake up very tender and flaky for me, others... not so much.  Jab a fork into the bottom and sides of the crust a bunch of times to vent steam while it bakes, and set the crust(s) aside to thaw completely.  Thawing the crust is important!  If you don't, you'll end up with a soggy bottom to the crust when the pie is done and nobody likes a soggy bottom...

Now, wash your rhubarb thoroughly in cold water.  Cut the leafy tops the and the flared bottoms off and discard them (they're tough and yucky).  Now dice the stalks into small chunks and pour them directly into your pie crusts.  You'll be surprised how much rhubarb it takes to make 3.5 Cups!   I know I was... I needed almost 11 cups (3 pies worth) and despite having what I thought to be a "mother-load" of rhubarb, I had to go back to the store so... get a LOT!   Note also, the frequent "use" of the adult beverage.

In a large(ish) mixing bowl, combine the 1/3 Cup of flour, the egg, the white sugar, and the sour cream.  Mix it together, slowly!  Why "slowly?"  Because the flour wants nothing more than to leap out of the bowl and to fly all over your kitchen!  That's rude. BAD flour!  I used a ball-whisk and slowly increased the rpm until I had a nice smooth and creamy mixture to pour over the rhubarb.  Pour the the creamy mixture over the rhubarb... Have a sip of your beverage.
You might want to use a spatula to gently press the mixture down and in amongst the rhubarb.  Relax for about 5 minutes with your beverage, as the mix slowly seeps in and amongst the stubborn chunks at the bottom.  Give the pie a jiggle or two to force the integration, use a school bus if necessary!  (Not really, that was a joke and probably an inappropriate one, but it was funny to me, in my kitchen.  With my beverage...).

Now, "Let's get crumbly!"  Mix the 1/2 Cup flour with the brown sugar, using a whisk, until you have a homogeneous mixture that looks like beach sand.  Slowly drizzle in the warm melted butter and keep whisking away until you have a nice brown crumbly mixture of heavenly goodness.  
Warm heavenly goodness looks like this.  It should feel like wet sand, and it should crumble, easily, when you use your fingers to break it up.
Sprinkle the crumbly heavenly goodness all over your pie.  Feel free to make additional goodness to pile onto the pie or to eat with a spoon!  Note the dwindling supply of my beverage.
Time to bake!!  Slide your pie(s) into the center of the oven.  Yes, I know that 450 is super hot, but you'll only bake the pie at 450 for 15 minutes.  Set a timer... If the pie sits in a 450 oven longer than that, it will burn and that's bad.  The initial "heat shock" is to give the pie crust a healthy head start.  After 15 minutes, drop the temperature of the oven to 350 and leave the pie in the oven for another 40 minutes.  It will grow a little puffy, which is nice.  It will look like this!
The hardest part of the whole procedure is pulling the pie out and letting it cool, but it must be done.  Resist the urge to cool it in the fridge for a faster "oven to mouth" experience, the crust needs that extra time with the hot filling to properly solidify their relationship.  Leave the pie(s) on the counter for at least two hours before refrigeration.
Slicing the pie should result in a firmly set, creamy custard, loaded with sweet/tart rhubarby goodness, in a tender (yet flaky) crust!  Hell to the YUM!  If your beverage isn't empty yet, well... it's been three hours.  Get your head in the game!


Monday, June 2, 2014

General Tips and Secrets for Great Grilling and Cooking with Fire

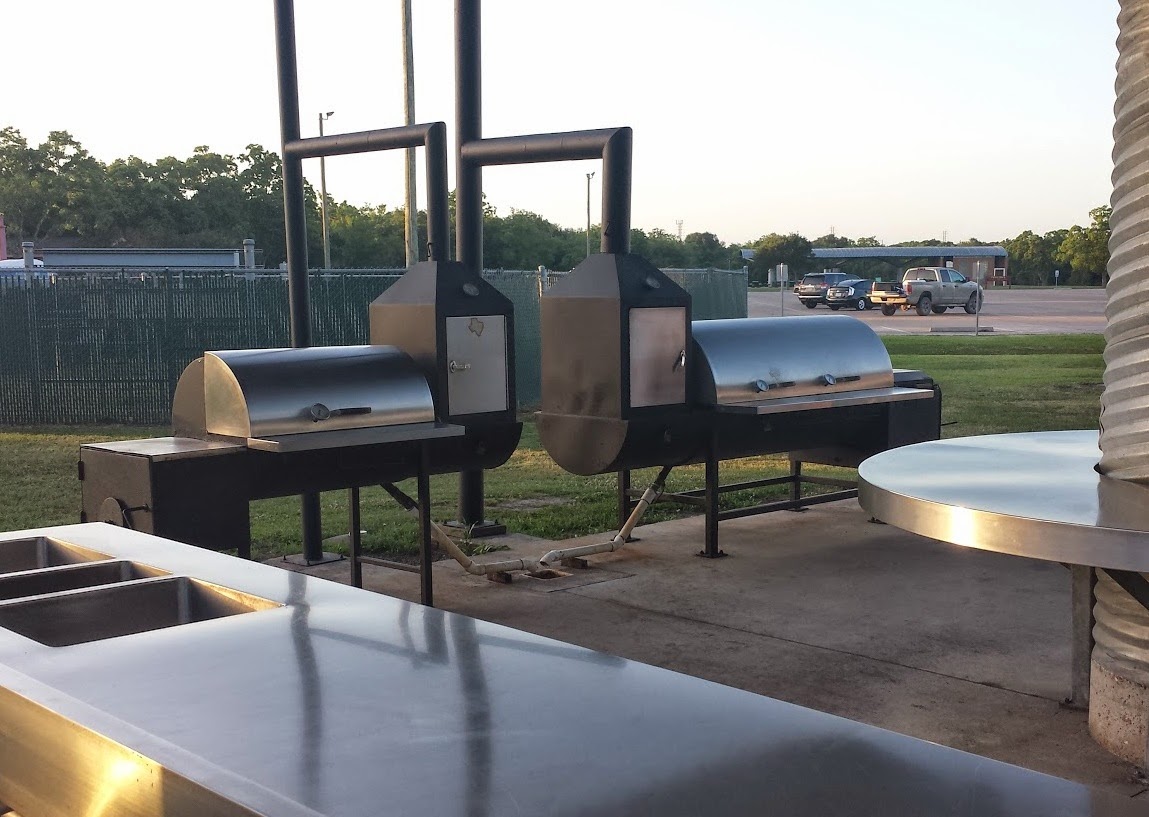
I suppose that entire encyclopedias have been written about "How to Grill Like a Pro" or "How to Master Your Outdoor Grill," etc.  I'm not trying to change the world here, but I feel like I have two or three cents worth of experience to add.  I've stood as the Pit-Master and logged thousands of hours of "cook time" in front of grills and smokers that range in size from a 4-burger "Tailgate Special" to the behemoth monsters in stainless steel kitchens that could feed 500+ hungry Texans some smoked brisket for lunch. 

I'm not trying to recruit an army of BBQ professionals to fly over to Afghanistan to feed all of the troops or anything (yet... because that would be awesome), but I smile whenever someone I've helped in the past calls to tell me, "Hey, my brisket/pork/chicken was great last night and my family loves me!"


I'm aware that this is a "Blog" and not a "Novel" so I'll try to keep this short.  Here's the cliff notes if you don't have the time to read the whole article:
  1. Temperature is EVERYTHING!
  2. Temperature is STILL everything!
  3. Charcoal, not Propane.  Just do it.
  4. If you must use Propane, FIX IT!
  5. The order of Meat on a grill.
  6. Rarely put anything right over the fire!
Let's elaborate:

Temperature is EVERYTHING!

It's true.  Most people don't know this, but when you buy a new oven, there is a whole chapter in the instructions on how to calibrate your oven.  Right out of the box, an oven may or may not hit the target temperature that you set for it... probably not.  Smart people take the time to adjust it so when they bake cookies at 350, for example, the temperature in the oven matches what the display says... "350."  The cookies are cooked through, on time, etc.  When you cook with fire, temperatures around your grill are going to range from 200 to 700 degrees so it is critical that you learn just how hot various parts of your equipment will get!  Invest in some equipment that will keep you apprised of exactly what's going on inside your grill.  Your food (and your guests) will thank you.  Most of what you cook is actually "roasted" or "baked" in your grill and not "grilled" directly over the fire so, it's important to build the right environment for cooking or smoking.

Learn your grill's environment.  What I mean is, you'll encounter a recipe (for example) that calls for "225 degrees for an hour per pound" or something.  Well, where is your grill 225 and under what circumstances?  If the temperature falls below 200, what's the quickest way to heat it back up?  I know my smoker responds instantly to the damper.  If I open it another inch, the response on my thermometer is instant!  The heat will climb another 15 degrees.  Of course, my fire will burn out more quickly... but this is to be expected if I'm trying to smoke some pork shoulders in January, vs. July.

Temperature is STILL everything!

As important as it is to know how hot your grill is, it is paramount to know when your food is done!  A chicken breast is "done," delicious, juicy, and tender at 160 degrees.  That same chicken breast is a flavorless dry "puck" of poultry 15 degrees later at 175 so... stop over-grilling everything to "make it safe!"  A dear friend of ours likes to buy those rotisserie chickens from the store, and then take them home to grill them because "they're so soft, they can't possibly be done."  *sigh*  I assure you, they ARE done, and they're "soft" because they're not over-done!  Get yourself a good "Instant Read" thermometer.  I can tell you from experience that you get your money's worth from these units.  A $10 unit will take almost a minute to give you a reading, and it will still be +/-8 degrees off and it will last you a summer or two.  A $90 unit will take 3 seconds to give you a scientifically hyper-accurate reading, and will be the last unit you ever buy.  Pick your poison.


I put food on the grill once it hits room temperature.  If you put it on the grill straight from the fridge, you'll burn the outside before the inside ever gets done.  Take your food out of the fridge and let it rest on the counter to "cook" up to room temperature first.  Then cook it, then pull it off the grill.  I pull food off the grill once they hit the following temps:
White Meat Chicken: 160
Dark Meat Chicken: 170
Pork Chops: 140
Steak: 120
Burgers: 140
Sausages: 140
Big Meats (Shoulders, Briskets, ribs, etc): 190, but only because it takes that kind of heat to break down the connective and "chewier" tissues.

Charcoal, not Propane.  Just do it. 

I'm not against propane, per se, you absolutely can not beat it's convenience.  Push a button... fire.  To grill with charcoal requires at least a 45 minute lead time before you're cooking, and you will get your hands dirty.  With propane, you walk out and push a button... <click> <BWOOOF>, done.  However, you'll never, never, ever get the same flavor out of a propane grill that you get with charcoal or wood; no matter how many "flavor baffles" your grill might have.  Period.  I've been smoking my pork shoulders with Apple wood lately... oh my!  Can't get that flavor with Propane.

So, if you want to impart smoke and flavor to your food, get a charcoal grill.  Then get some lump charcoal (burns hotter with less ash) and some chunks of wood (Mesquite or Hickory to start with).  I might even suggest, even if you have a multi-thousand dollar super-grill, that you spend $100 at a garage sale and hide a small charcoal unit in your backyard somewhere to experiment with.  You'll be converted in a season or two.

If you insist on propane, fix it! 

I have a buddy who was amazed that the "Searing Station" on his new propane grill fired all the way up to a ridiculous 1,500 degrees.  Seriously, it melted the decorative trim around the outside of the grill.  That's more than double what you would ever need to put a good sear on a steak.  A few inches over open flame is about 500 degrees in a normal grill so, he had some adjusting to do.  Turns out, he had the regulator valve on his propane tank all the way, "wide," open!  I suggest that you take a trip out to your grill and take its temperature, adjusting all of the propane valves to where they are supposed to be for the burners to operate properly.  This is basically the same procedure as calibrating your oven!  Dial up or down as necessary.  When you adjust your burner to "Medium," you want "Medium heat!"


The order of meat on the grill.

Most people want to pull all of the meat off of the grill at the same time, so they can serve it all to their guests at dinner.  You can't tell your grandmother, for instance, "You have to wait, Gramma, because you wanted chicken and that takes longer!"  Super thin burgers will be done twice as fast as thick steaks, and stuffed pork chops roast up more quickly than stuffed chicken breasts, etc (see temperature chart, above).  There are lots of variables here, grill temp, type of meat, starting temp, etc.  My advice is to keep a generous "warm spot" on the grill that's not near the flame.  Apply your food to the grill according to how long it should take to cook (longest first).  Keep a close eye on everything (with your temp probe) and move stuff to the warming area when it gets close to its target temperature.  Move slower meats to the hot zone, etc.  My secret?  I almost always move everything to the warming zone before I put the steaks over the fire.  Steaks are sacred (and expensive) and they deserve your full attention.  They cook quickly so there is very little danger of anything in the warming area overcooking.

Rarely put anything directly over the fire!


Fire is hot.  The only thing with enough fortitude and muscle to stand up to 500+ degrees is a thick steak.  Unless you're ready to advance to the time honored Cajun method of blackening food (not for rookies), most of your food should cook "near" the flame, and with the door to the grill closed!  Propane grillers should stick to Medium flame adjustment.  Hotdogs are so much better if you let them come up to temperature slowly, without charring the outside.  Chicken skin should be crispy, not burnt, and pork chops retain so much more of their juices when cooked more slowly.  The fat in sausages or hot links should be slowly rendered into flavorful juice and the casing should not be burned through (or poked with a pair of BBQ forks).  This gives sausages that wonderful <SNAP> when you bit into them.  Learn how hot your grill is... Most foods cook with much more flavor when they they "roast" or "bake" in a closed grill at 375 to 400 degrees.

Good luck, and happy grilling!!

Wednesday, May 28, 2014

Super Simple Smoked Mushrooms

I've been cooking a LOT of mushrooms lately.  It's the season for Morel Mushrooms in MN and I've had some luck so... I've been staring at so many shrooms in my kitchen that I started thinking of new ways to prepare them all.  What follows is probably the simplest way to cook a stack of mushrooms that I've ever devised.  It's incredibly, embarrassingly, head-shakingly simple, and yet more people want, crave, compliment, and/or ask about them than any other mushroom recipe I have.


You Will Need:
  • A bunch of shrooms, any kind
  • Olive Oil
  • Salt
Rinse your mushrooms and pat them dry.  Place them into a large bowl and drizzle a healthy amount of olive oil over them as you shake the bowl to ensure good coverage.  You don't want them "lathered" or saturated with oil, but you want at least a bit of a drizzle on each one.  Then, give them a healthy sprinkling of Kosher salt.

Now, roll out a heat-proof grill mat, oven liner, or sheet of heavy duty aluminum foil, onto your grill or smoker.  Build a fire somewhere away from the liner.  Pour all of your mushrooms onto the liner, away from the fire.  Cover.  Walk away.

Yes, it's that simple. What you see here is a couple of boxes of sliced Portabella Mushrooms that were left on this grill mat for about 2 hours at 250 degrees.  The best thing about this method is, you can't burn the shrooms!  The longer you leave them on, the more smoke flavor they inhale.  I use some long handled tongs to shake them up a bit, every 45 minutes or so.

When you think they're as done as you might like them, taste one.  If you like it, slide them all into a bowl and lid them up.  They'll keep in the fridge for a week or so!  What then? 

Well.... you could:
  • Pile them onto a Bacon-Wrapped Filet Mignon
  • Eat them with a fork
  • Chop them up and make the best homemade Cream of Mushroom soup, ever
  • Lace them into a gorgeous Pasta Salad with some Mozzarella Cheese
  • Add them to a burger with some Bleu-Cheese sprinkles
  • Toss them onto a Pizza
The possibilities are almost endless.  Recently, I used them to garnish some "Surf and Turf" Ka-Bobs.

Tuesday, May 20, 2014

Grilled Shrimp KaBobs

I have a love/hate relationship with KaBobs.  I love them, don't get me wrong, but I have conditions.  The pre-assembled Kabobs you buy in the store always seem to have too many of the wrong kind of vegetables, and not enough meat!  Can I help it if, sometimes, I'm in the mood for a stick full of "meat only" and only one sliver of onion, or Jalapeno?  If you're going to enjoy a skewer full of grilled food, it seems to me that you should be able to assemble your own "Stick," right?


You Will Need (Suggestions, really):
  • 8oz fresh UNCOOKED shrimp per person
  • Various Dry-Rubs, Spices, Salt, and Pepper
  • Melted Butter
  • Variety of other Kabob morsels including:
    • Zucchini Squash
    • Pineapple
    • Jalapeno
    • Bell Peppers
    • Bacon Chunks
    • Red Onion
So, the rule of thumb with any Kabob is that all of the chunks on the skewer should take the same amount of time to cook as the chunks of meat.  If you're using Chicken, you'll want bigger hunks of the other veggies because Chicken takes longer to cook than beef or shrimp, etc.  Shrimp only take 3-5 minutes to cook on a grill and that's FAST so; be sure to cut and portion the other veggies accordingly.  I cut this fresh pineapple very thin, for example, so the ends will caramelize and the flesh will cook through in 3 minutes.  Make sure all of the portions are the same size, you don't want some of them burnt and some of them underdone.

When I do Kabobs, I like to offer my guest the chance to build their own skewers.  To that end, I will pre-slice and prep all of the veggies, pre-cook the bacon chunks, and have them all available in various containers to grab from.  I lube all of the skewers with Olive Oil and line up the shrimp, veggies, bacon, spices, rubs, etc. and say, "Go!"

On this particular day, guest number one (Cindy) was a trend setter.  She wanted one skewer of veggies, and one of pure shrimp.  No problem.  I found it funny that everyone chose to follow her lead, but that's how it went down.  As the cook, I tend to hang back and to stay out of the way until the dust settles.  Once the skewers are built and everyone has a beverage, they tend to occupy themselves away from the grill so that I can go to work.

Keep all of the skewers in line according to who built them, so you can keep track of which skewers belong to which people on the grill.

Since I'm using an offset smoker, I built a hot fire with charcoal and Hickory wood in the firebox, and I set all of the skewers in the smoking chamber for about 5 minutes.  This added a bit of smoke flavor and brought everything up to ambient temperature before we put the spurs to the meat.

After 5 minutes of smoking, I put all of the skewers (in order) onto the grill, right over the fire, for two minutes (close the lid).  After two minutes, gently use your long tongs to flip each skewer over to the other side for an additional minute or two.  Remove them from the grill and immediately brush them with melted butter.


Since you lubed the skewers prior to building them up, it should be super easy now to slide all of the shrimpy goodness off of the skewer and directly onto a plate.  Easy, right?

Friday, April 25, 2014

Four and Twenty Blackberries Baked in a Pie!

"Friday" rhymes with "Pie-Day" so today I bring you a "Sour-Cream Blackberry Pie!"  Don't let the name fool you, this pie is tart, sure, but it's anything BUT sour!


You Will Need:
  • 1 Frozen Pie Crust
  • 1 Cup (8oz) Sour Cream
  • 3/4 cup sugar
  • 3 TBSP A/P Flour
  • 1/8 teaspoon salt
  • 3 Cups FRESH Blackberries (or a 16oz frozen bag of blackberries, but the fresh berries are so much better that I hate to even mention this option, so forget I ever brought it up)
NOTE: Frozen pie shells come in packs of two, so why not double the recipe? 


This is the easiest pie you will ever bake.  In fact, you'll spend more time managing the pie-crust than you will making the pie.  This pie doesn't bake at a very high temperature, so you'll need to par-bake the crust to give it a head start.  Thaw the crust thoroughly so that it's at room temperature, then dock the bottom and sides with a fork to vent any steam.  You don't want giant air-bubbles in your crust, so use the fork to poke holes in the bottom and the sides!  Bake the crust according to the directions it comes with, but only for about 3/4 of the specified time.  It will be "tan" but not quite "golden brown."  When the crust is done, set your oven to 350 degrees, in anticipation of the pie that will be in there, soon.


Now, for the pie filling... Plop the sour cream, sugar, salt, and flour into a bowl and stir it together with a paddle or spatula.  The sugar will take some time to dissolve and you don't want gritty filling so... really beat the crap out of it!  BEAT BEAT BEAT!!  Let it sit, covered, in the refrigerator for 1/2 hour and taste it.  The sugar should be completely dissolved and your brain should tell you, "Hey, this would be a downright spectacular fruit dip to serve with berries and cut melons!"  When that happens, you'll be ready to add the blackberries!  Dump them in there and gently stir them into the mix.  

You could stir the berries more violently, I suppose, if you want some of the berry juice to mix with your filling, but I prefer to let the heat in the oven "pop" them open.  If you do crush the berries during the stir, or if you used frozen berries, you'll have a purple pie.  That's not a bad thing, but some people might be averse to purple food.  The only purple food I ever ate was Poi, in Hawaii.  I don't recommend it.  In fact, I think I'd recommend that you eat the sand on the beach before you try to eat Poi.  Nasty stuff, that.


Pour, fold, and scrape every ounce of goodness from your bowl into your pie crust.  Gently mash the berries into place using your spatula and make sure the filling oozes into the gaps.  If you're persnickity about how the pie will look when it's done, you may want to gently pluck out and rearrange some berries so that things look a bit more "even" to your anal-retentive self.  In any case, you're ready to bake!  With the oven set to 350, place a pie in the center rack, and let it bake for 50 minutes.  Baking two berry pies at one time can be a bit unpredictable so I chose to bake mine one at a time.


The heat of the oven will pop the berries and set the filling.  If you jiggle the pie, it might "dance" a little bit, but it should be noticeably more firm when it was when you slid it in there.  Also, there should be some berry juice highlighting the pie with accents of bright purple here and there.  You'll need to resist the temptation to just eat it with a spoon at this point.  Set the pie on the counter to cool.

I recommend a modest scoop of Rocky-Road ice cream with this pie.  The marshmallows tie-in the texture and the chocolate adds a nice contrast.  The nuts don't hurt, either!

Tuesday, April 22, 2014

Portobello Blues

CAUTION, this recipe has a "Vegetarian Option" in deference to my good friends Scott and Shelly.  It is appropriately labeled so you don't have to read it, if you don't want to.

Recently, the upper Northern regions of MN experienced a great loss when the owner of the Foundry Tavern in Cloquet stopped making/selling her famous Blue Cheese dressing.  It was always my intention to get some of that white gold and to stuff some portobello mushroom caps with it, but somehow we always managed to eat it all before I could get around to buying the mushrooms.


With the incredible flavor of her chunky dressing burned into my head, I set out to duplicate it, and to stuff some mushrooms with it, and to wrap them with bacon!

You Will Need:
  • 15 "Baby Bells" Portobello Mushroom Caps
  • 1lb of Thick Bacon
  • 2 Cloves Garlic, Peeled and Minced
  • 1 8oz block of cream cheese, softened
  • 1/4 Cup Half and Half
  • 4oz Blue Cheese Crumbles
  • 2Tbsp Chopped Fresh Chives

Get things started by dumping the garlic, cream cheese, half and half, chives, and blue-cheese crumbles into the bowl for your mixer. Use a paddle attachment and start it up, low and slow.  When things first start to come together, the mix will look wet and sloppy and you'll think, "There is no way this is going to work," but stick with it.  When things are combined, bring the speed of the mixer up to medium for at least two full minutes.  Sprinkle in some salt and pepper.  This will set up into a gloriously thick and delicious blue cheese mixture and you'll be tempted to just eat the whole batch with a spoon.


Now, pull the stems out of your baby bellos and use a small kitchen spoon to stuff each cap with cheese.  Be generous. While you're doing this, start to contemplate the wine you'll need for this dish.  I think "Cab Sav" when I cook portobellos, but that might be because I usually serve them alongside a thick New York Strip.  You have an awesome blue cheese to think about, and bacon is coming too!  Personally I don't think you can go wrong here, when it comes to a wine selection.  Perhaps my friend Tim (California man with a nose for the grape) will comment with his ideas.  Drizzle some olive oil onto a small steel pan (or cookie sheet, if you want to use your oven, rather than the grill) and line up your little caps as you get them stuffed.  If you want to dip the mushroom stems into your cheese to snack on while you do this, I will not be there to stop you...

Now, using some kitchen sheers, cut your bacon strips in half.  Lay a 1/2 strip of bacon over the top of each cap, and tuck the ends underneath the bottom.  Take care not to squish the cheese out from under the bacon.

**** VEGETARIAN OPTION ****
Using a vegetable peeler, peel some thin strips of eggplant or zucchini as a substitute for the bacon.  The eggplant will take on a very presentable color and will look nice.   It won't taste as good as bacon, but it's probably better for you, if you are trying to live to be 120.

Ok, time to cook.  These little dudes only need to stay in the oven long enough to crisp up the edges of the bacon.  I use my grill, rather than the oven, but the concept is the same; 375 degrees for about 30 minutes.  Hindsight being 20/20, I'm looking at this picture and I'm wondering how marvelous it would have been to hide a thin slice of jalapeno in the base of each mushroom, prior to stuffing?  Your mileage may vary.  Regardless of how you might want to embellish, this is an amazing dish that you will love!

I planned to serve it for Easter brunch but sadly, we ate them all before any of my guests arrived.  Early bird... worm... you know the drill.