Thursday, July 19, 2018

Sweet and Spicy Bacon Wrapped Chicken

So, I was staring into my refrigerator the other day, hungry as usual.  My stomach and my brain had this interesting conversation (as they often do;  I should charge admission, those conversations get pretty weird).  Here are some snippets that I managed to remember:  "Chicken!  Is that thawed?  Wait... Spicy chicken, that sounds good.. What's this leftover bacon doing in here?  OOOH, Sriracha!  I should probably use these green beans before they get soft, and that spinach has been in there awhile..."  Viola:


While this dish was inspired from a random refrigerator "pull," there's no reason you couldn't cook it yourself!  Delicious, super simple, let's go!

You Will Need:
  • 2 Large Skinless Boneless Chicken Breasts
  • 1 lb Thinly Sliced Bacon
  • 1 Cup Brown Sugar
  • 1 Tsp Salt
  • 1 Tsp Pepper
  • 1 Generous handful of fresh green beans
  • 2 Generous handfuls of fresh spinach
  • 1 Healthy Squirt of Sriracha hot sauce
Preheat your oven, BBQ, Grill, or Smoker to 375 degrees!

Start with a 13x9" casserole dish.  Wash and trim your green beans to your liking (I like them long) and dump them into the casserole.
Wash your spinach and dry it as best as you can.  Pile it up on top of the green beans.  Don't worry if the pile looks huge, it should!  Spinach is very sneaky and will shrink to almost nothing when it cooks.  So, fear not!  Build yourself a big mountain of spinach greens!

To get the chicken ready, dump the brown sugar, salt, pepper, and Sriracha in a bowl.  Use your fingers, use a fork, whatever... just mix until it's all a nice smooth crumbly mixture.
Now, let's turn our attention to the chicken.  Wash your hands, grab your knife in your dominant hand, and spin the breast around with your other hand as shown.  Cut it, with the grain, into 3 or 4 equal strips.

These were large breasts, so I got four strips out of them.  Yes, I used the words, strip, large, and breasts in one sentence!  Let's all have a chuckle... now, grow up and let's get back to the kitchen!
Take each chicken tender and coat it with the sugar mix.  You can try to use a fork, like I did here, but you'll eventually get frustrated and abandon it so... just accept that you're gonna get sticky and roll and press each breast in the spicy sugar, then wrap it in a strand of thin bacon.

The world loves thick bacon, so; why thin bacon? Well, thin bacon stretches and wraps so much better than thick bacon.  It also crisps up more quickly and requires less cooking time.  The chicken will be done in a relatively short amount of time, and we don't want the chicken in the oven for even a minute longer than necessary so... Thin bacon is the ticket.

Pile all of your wrapped tenders on top of your spinach, pressing down when you have to.  Sprinkle the tops with your favorite BBQ seasoning if you like.  Insert a remote temperature probe into your largest tender, and slide them into the oven.
When your chicken touches 165F, pull the dish out and have a look.  The kitchen should smell interesting... a delicious mix of sweet, spice, bacon, veggies, YUM! 
You can cut into a "test" tender if you want, the juices should run clear, and since we cut them WITH the grain to start with, each tender bite should now go against the grain for a super easy "chew" and easy cutting!
Serve the chicken over a mound of your veggies and dinner is DONE!

Monday, May 7, 2018

Smoked Pork Belly Chicharróns (Pork Rinds)

When most "normal" people hear the words, "Pork Rind," they make a funny face.  Well it's more of a "squeamish" face, actually.  I can't blame them.  When I think "Pork Rinds," I think of convenience stores and bags of puffy plastic looking fried pork skin that is so over-seasoned that "normal" people couldn't even eat them.  BUT, What if you took whole slabs of bacon, with all of that delicious meat and fat, and you left the skin on, and cut it into bite-sized chunks and THEN you gently deep-fried it?  You've an AMAZING snack called a "Chicharrón!"


You Will Need:

Luckily, more and more stores are selling whole pork bellies these days.  You'll need a whole skin-on pork belly, smoked to perfection and an internal temperature of 190 degrees.  You can use my recipe, here, if you choose, or use any one that you like.  Just place the whole cooked belly into the refrigerator overnight before you proceed.
Place the belly on your cutting board and slice it into planks, just exactly as though you were slicing bacon.  Cut them 1/2" thick.
Then, slice 1/2" cuts from your 1/2" slabs until you have hundreds of gorgeous little bite-sized chunks of the best snacks you'll ever make!
Place them, a handful at a time, into your fry-basket.  Gently drop them into the hot fat and keep your hands, arms, elbows, and anything combustible away from the fray!
When cold pork fat hits hot oil, lots of really cool things happen.  It melts down, and crisps up.  The skin bubbles and gets super crispy.  The meat firms up and develops a nice firm "chew."  So, once they cool down and you can pop them into your mouth, you get a flavorful and amazing crispy chewy snack that melts in your mouth!
Is this a ton of work to go through in order to have a giant basket of amazing pork snacks?  Yes.  Is it worth it?  Yes!  My friend Toney stood tall at the fryer and cooked all of these.  We put them on the table for our Cinco de Mayo party and the next morning, when we were going through the party leftovers, we learned that these had completely disappeared!  We had leftover fajita meat, guacamole, salsa, tortillas, etc, but the Chicharróns completely disappeared.
This made me sad, because I wanted to snack on them for awhile...

Monday, April 30, 2018

Bourbon Peppercorn Cream Sauce

One way to turn a good steak into a great steak is with an awesome sauce!  Bearnaise and Hollandaise sauces grace many a table at fine steak houses to complement Filet Mignon and Ribeye, Prime Rib is always a little better with an excellent horseradish sauce, and for my money, a hearty New York Strip is heavenly amazing with a fine Cabernet Sauvignon and a velvety Peppercorn Cream sauce!  Let's get started...


You Will Need:
  • 1/4 Stick butter
  • 1/4 Cup finely diced shallots
  • 8oz Good Bourbon
  • 3 Cups low sodium chicken stock
  • 4 Sprigs FRESH thyme
  • 2 Cups heavy cream
  • 2 tsp. freshly cracked black peppercorns
  • 2 tsp. whole peppercorns
  • 1/2 oz. Grated Parmigiano-Reggiano cheese
  • 2 tsp. Dijon mustard
  • 2 tsp. fresh lemon juice
  • 2 tsp. Worcestershire sauce
Ok, melt your butter in a large non-stick sauce pan and sweat your Shallots.  Remember, when sweating, you want to see little bubbles but you don't want to hear a loud "sizzle!"  Sweat the Shallots for 5 minutes.
Take your 8oz of Bourbon and pour half of it into a good glass with a few ice cubes.  This is for you to sip on while you stand there stirring the sauce.  Turn up the heat to Medium High, and take the remaining 4oz of Bourbon, and pour it over your Shallots, stirring until the mixture reduces by about 1/2.  This should take about 3 mins.  Shallots, Garlic, and Onions are all packed with alcohol soluble flavors, so do not skip this step unless you have a deadly allergy to booze!

Now pour in the Chicken Stock and add the Thyme.  Stir until it has a nice boil, and then leave it alone, glancing over at it every now and again to make sure it's not boiling over, and let it reduce by half.  This should take 20-30 minutes! 
While the sauce reduces, turn your attention to your peppercorns.  Take 2tsp of peppercorns and place them into a plastic sandwich bag.  Give the bag a few sturdy WHACKS with a mallet to crack them up.  You don't want pulverized pepper powder here, you're going for a "rough chop" of sorts.
Once your sauce has reduced, use some tongs to remove the Thyme sprigs, and add the cream and the crushed peppercorns.  Reduce the heat until you get what I like to call a "firm simmer" (obvious bubbling, but not a rolling boil, see photo on left).  Let it simmer, stirring often, until the mixture reduces to about 2 cups and is slightly thicker than cream.
While you're waiting/stirring the sauce as it thickens, have another sip of your Bourbon and prepare the final mix for the sauce.  Whisk together the mustard, Worcestershire, lemon juice and the remaining 2tsp of whole peppercorns.  Set it aside and grate your cheese. 
Here's what 1/2oz of ungrated Parm looks like.  Grate it into a little pile and sprinkle the pile over the sauce as it thickens.  Stir it in, and continue to reduce the sauce.
Near the very end, when the sauce is juuuust about as thick as you want it, add the whisked ingredients and stir them in.  The sauce should certainly coat and stick to the back of a spoon!
If you make this sauce ahead of time (I highly encourage it because when you're grilling steaks, your focus should be on the steak and not the sauce), you can store it for hours in a clean stainless steel thermos.  Don't use a cheap plastic one because plastic holds onto flavors like "coffee" and you don't want that in your sauce!  Ignore the empty Bourbon decanter in this picture... that was a personal tragedy that required an entirely different effort to solve.  Just remember to pour the sauce into a gravy boat or something before you serve it.  Pouring sauce out of a thermos bottle at a well set table is not exactly, "Fancy!"

Thursday, April 12, 2018

Corn Polenta Pulled Pork Tacos!

When I make pulled pork, I make a LOT of pulled pork!  This usually leaves me (or my customers) with some leftovers.  This explains why I hear the question, "What do you do with your leftover pulled pork?" asked a lot!  Today, I am presenting a simple, yet delicious way to present your leftover BBQ pork as if it were a brand new dish.  I present to you, the Pulled Pork and Polenta taco!

Old, made NEW

Polenta is incredibly versatile!  You can serve it creamy, or you can fry it into fritters and serve your pork on top of it, like a crunchy cornbread tostada!  This recipe will make a large batch of basic corn polenta.  If you want the fried fritter version, just park this recipe in your fridge overnight, then cut and fry your fritters the next day.

You Will Need:
  • 1 large "Blurp" of Olive Oil
  • 1 medium yellow or red onion, finely diced
  • 2 cloves garlic, finely minced
  • 1 quart chicken stock
  • 1 cup coarse ground yellow cornmeal.
  • 1/2 stick butter.
  • Salt/Pepper to taste
  • 2oz grated Parmigiano Reggiano cheese (the good stuff.  It should not say, "Kraft" on the label)
  • 1 bundle green onions finely diced
  • 1 oven, pre-heated to 350 degrees F 

We'll begin by sweating the onion and garlic in olive oil, in a large pan on the stove.  What's a "Sweat" vs a "Saute?"  Heat!  If you hear hot sizzling, you're sauteing.  Turn the heat down to Medium and let the oil bubble very slowly while onion and garlic take a nice sweaty sauna.  Leave them in there for at least 5 minutes.

Add some salt and pepper and stir things around.  If the onions are soft and you smell the garlic, it's time to move to the next step and pour on your Chicken Stock.  Bring the whole mess up to a quick boil, then reduce it to a bubbly simmer.

When your stock is bubbling, it's time to add the cornmeal.  Do NOT dump it in all at once!  Cornmeal grains are like Freshman at a college party.  If you bus them in to your party all at once, they'll get frightened and huddle and cling together in a lump and they won't help your party at all.  The trick is to sprinkle them in slowly, letting them each get surrounded by a flavorful liquid, individually, while you stir the mix.  Before you know it, they'll start dancing in the simmer and the party will be nice and thick, with everyone having a great time!

Once all of the cornmeal is stirred in and the mix is nice and creamy, put the lid on the pot and slide it into your oven (pre-heated to 350F, remember?) for 40 minutes.  Every ten minutes, reach in (with gloves) to remove the lid and give it a stir.

While the polenta is in the oven, chop your onions and grate your cheese.  You should weigh the cheese on a kitchen scale because 2oz of Parm is more than you think!  This picture shows exactly 2oz of great Parmigiano grated in a bowl, sitting next to 1 cup of yellow cornmeal.  See?  Quite a handful!
When your 40 minutes are up, remove the polenta from the oven and stir in the butter.  Stir and stir until the butter melts and is fully incorporated.  Give it a taste at this point, it should taste like it needs just a little bit of salt.  Do NOT add salt yet... the Parm is coming!
Parmigiano Reggiano cheese is a remarkable thing (no, not the shit in the green can, I'm talking about the stuff you pay $20/lb for from your cheese monger).  It will bring more creaminess and more "salty" than you might imagine.  Add your green onions and Parm.  Stir it all together while the cheese breaks down and moves into the dish with everyone else. 
After a final stir, it will be ready to eat!  NOW is the time to adjust for any seasoning.  It's good, right?  Better than grits, and good enough to stand on its own!

This stuff is incredibly versatile, and it goes so well with pork!  Add a bit of sugar, and it makes an amazing side dish on it's own.  Spread it out on a flour tortilla and stack on some pulled pork, fresh salsa, and some Cilantro!  Roll it into a street taco, or (my favorite), cut a round or square portion of polenta after it cools in the fridge, and fry it like a pancake until it develops a crispy brown crust.  Stack a generous pile of pork and maybe some avocado cream and fresh pico de gallo on top?  HOOOO boy, it doesn't get much better than that!!

Tuesday, March 13, 2018

Authentic Cajun Jambalaya

When people think "New Orleans," they also think, "Food!"  New Orleans cuisine is world famous and for good reason.  What do you get when you mix French immigrants, access to world class seafood, locally sourced rice, vegetables, beef, pork, chicken, and 99% of the world's crawfish population?  You get amazing ingredients, a variety of preparation techniques, and a menu that the rest of the world tries to replicate.

The "Big Three" dishes to have been born in The Big Easy are Gumbo, Etoufee, and Jambalaya.  Of these, Jambalaya is the easiest to make because you don't have to cook a Roux.  Let's get to it!


You Will Need:

  • 4 Tbsp Olive Oil
  • 3lbs Chicken Thigh Meat (skinless, boneless), cut into bite-sized chunks
  • 2lbs Andouille Sausage, smoked or cooked and cut into 1/4 inch disks
  • 1lb of Raw Medium Shrimp, prepped and peeled
  • 2 Yellow Onions, diced
  • 4 Large Ribs of Celery, sliced into 1/4" crescents
  • 1 Green Bell Pepper, diced
  • 1 Red Bell Pepper, diced
  • 4 Tbsp Spice Mix.  Equal amounts of each of the following:
    • Cayenne Pepper
    • Chili Powder
    • Salt
    • Pepper
    • Paprika
    • Garlic Powder
  • 2.5 Cups uncooked long grain rice
  • 2 (14 ounce) Cans of diced tomatoes, with juice
  • 4 Cups chicken stock
  • 4 tablespoons chopped fresh parsley
  • 1 Bunch of green onions, finely chopped
Preheat your oven to 350 degrees, and grab your biggest cast-iron pot or dutch oven.  This recipe will make enough Jambalaya to feed at least ten people!  Also, things happen fairly quickly in this recipe, so you'll want to prep, dice, and cut all of your proteins and veggies ahead of time!


Over Medium-High heat, add the oil.  Once it's hot, dump the chicken into the pot.  Stir and cook the pieces just long enough to brown them on all sides. When the chicken is browned (but not yet fully cooked), remove the chicken (leave the oil in the pot), and set it aside.

Now, dump the Bell Peppers, Onions, and Celery (also known in the Cajun Community as "The Trinity"), into the pot.  Also, sprinkle the spices over the top.  Stir and cook over Medium High heat for ten minutes or until the veggies are soft and the onions are clear.


Once the veggies are tender, Pour in the cans of tomatoes (with juice), and the chicken stock.  Stir it well.  Add the rice and stir it in until everything is well mixed.  Bring up the heat until it boils, then reduce it to a simmer and mix it well.


Add the browned chicken and the Andouille sausage.  Gently stir everything together.


Once everything is stirred together and it is lightly bubbling and simmering, cover it up with a tight-fitting lid and slide it into your 350 degree oven.  Leave it in the oven for 45 minutes!  Amazing things will happen in there... The sausage will render it's glorious fat into the mix, the rice will soak up flavors from the chicken, the Andouille, the garlic, etc, etc.  It's a good-time party in that oven!  "Laissez les bons temps rouler!!"
After 45 minutes, the oven-party should be winding down and the ingredients should be fairly spent!  Put the pot back onto the stove and turn it up to Medium-High.  Stir in your shrimp, the parsley, and the green onions.  The shrimp and the herbs cook very quickly so; stir them in, put the lid back on, and leave them to cook for about 7 minutes. 

When you lift the lid, the shrimp should have curled into a tight pink ball.  The rice should be tender and very flavorful.  The dish in the pot should look bright, colorful, and the smell should be nothing short of AMAZING!

Pour this into a nice ceramic bowl and serve it with a cold beer or a cold white wine.  A nice Sauvignon Blanc or maybe a Pinto Gris.  Cajun purists would suggest a Pink wine with lower alcohol like a Zinfandel.  Regardless of the wine you choose, take heart that this dish doesn't need "sides" to compliment it.  It stands, like a beast, on it's own because it has everything!  Veggies, carbs, grain, proteins, salt, spices... Tuck in and enjoy!

Monday, March 5, 2018

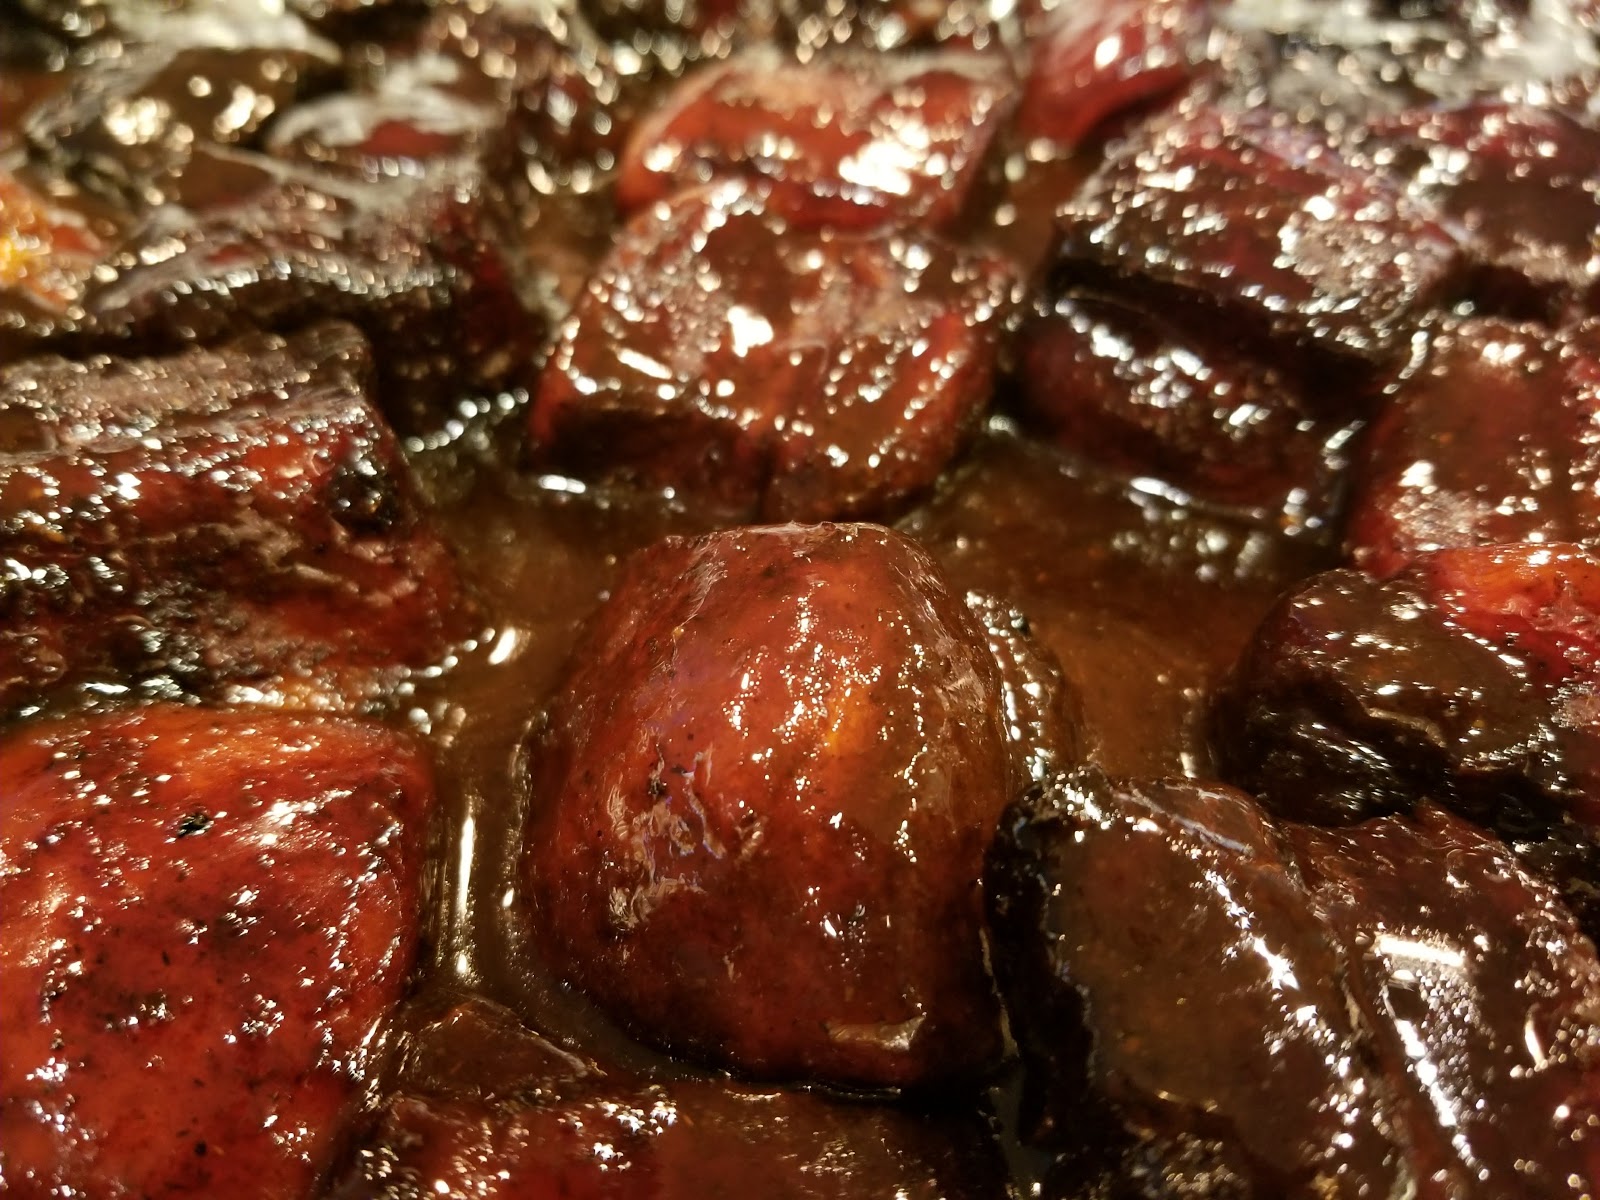
Pork Belly Burnt Ends


For my money, the best single "bite" out of a whole cow, is a properly cooked, spiced, and cubed "Burnt End" from the Point of a properly smoked brisket!  WOW, is that good stuff, or what?  Well, God, in his infinite wisdom, also gave us the pig!  Pigs are packed with a variety of tender and delicious bits, and their rotund little bellies are the best, hands down.  What if you could make Burnt Ends from a pig?!  Would they be as good??


There is no more flavorful, juicy, or soft and tender portion of meat than pork belly.  Humans have savored pork belly for years.  Prior to refrigeration, we knocked ourselves out trying to preserve such a valuable morsel.  We finally settled on a process of salt curing and cold smoking the belly and "bacon" was born.  I submit to you that today, 100 years later, we have refrigerators and freezers and while bacon has its place in the world, there are other ways to prepare pork belly!  Some of them might even be MORE delicious than bacon!  There, I said it....

You will need:

  • 1 Whole, 10lb untrimmed SKINLESS pork belly
  • Chunks of Apple Wood / Charcoal
  • Pork Rub
  • Sharp filet-knife
  • 1 cup brown sugar
  • 1.5 sticks of butter
  • 1/2 cup honey
  • 1/2 cup bbq sauce
  • 1/2 cup apple cider vinegar

Lay your pork belly out on your board and have a look.  What you want is a nicely squared hunk of belly, that is trimmed to a uniform thickness.  Use your knife and square off the edges, and "shave" down the thicker end of the belly if needed.  The end-goal here will be to cut this marvelous piece of meat into cubes that are roughly 1.5 inches on each side.

Cut 1.5 inch strips, and then cut 1.5 inch squares out of each strip.  During the cook, most of this fat will render out and the squares will shrink down to about an inch square, so cut them bigger than "bite size" now.  If you're entertaining ideas of salt-curing this belly and cutting your bacon into cubes, rather than strips, you're not alone!  We'll save that idea for next time, but for now, collect all of your belly-cubes into a bowl and spice them up with your pork rub.

Make sure all six sides of each cube get a nice dusting of your spice rub.  You may have to work in batches, moving the pig from your board, to the bowl, to the rack.  Why the rack?  Well, you could put the cubes right into your BBQ pit, but then you'd run into trouble when you tried to take them off, one by one or whatever.  Besides, they get sticky so... it's so much easier to spray a rack or two with non-stick spray, and then lay out your cubes with enough space between them for the smoke to work it's magic!  You want the fat to render AWAY from the cubes, and a nice dark crispy bark to form, so resist the temptation to put them into a foil pan!

Get your pit cooking with a mix of charcoal and apple wood.  Bring it up to 250 degrees before placing the racks into your pit.  You're only going to leave them in there for 3.5 hours so be sure to preheat first; DON'T BE LAZY!  Close the lid and leave them alone in there for 3.5 hours.

When 3.5 hours is up, your burnt-ends will have taken on a nice dark bark from the smoke and they'll be ready for you to tenderize!  Stack them all, loosely, into a half-sized foil pan.
Sprinkle the sugar and butter over the top of them, and pour over the honey.  Don't give me any of that, "Ken, wait... are you SURE you need to add MORE fat," crap, either!  I'm well aware of the fat content of pork belly and while we rendered a lot of it out, yes, there's still quite a bit there.  BUT... we need a braising liquid to tenderize these beauties and butter and brown sugar go so well together, not to mention the honey.  Don't fool yourself, we aren't baking these as a delightful fat-free snack to reward ourselves for doing some yoga this morning... Think of this as "fuel" for chopping a few cords of wood later, for your family's survival in the Yukon.  ...or to fuel your BBQ Pit.

Cover this goodness, tightly, with a couple layers of foil, and put it right back onto the pit (250 degrees) for an hour.  Close the lid... Walk away...

After an hour you will, flat out, be tempted to just start eating these like so much popcorn, despite the fact that they're "Napalm Hot!"  Hang on... don't burn your face off (yet), take them out of the foil pan and place them onto a serving platter.  Drizzle a mix of your favorite BBQ sauce and apple cider vinegar over the top of them, and toss to coat!
Now, pick one up (I had to use a fork, at first, because they were still too hot) and take a bite!  Hot Damn, Tamale, baby!  A small pocket of liquid bacon fat exploded when I bit down and effectively basted this bite with what could only be described as the tears from a deliriously happy Cherub who had just hit the lotto in Heaven somewhere.  The meat was as soft as ice-cream and it was every bit as good as I'd hoped it would be!  These are extremely rich and decadent, I don't recommend eating more than 3 or 4 of them.  At a time.  And WOW, are they ever great with a cold beer..............