Wednesday, August 21, 2019

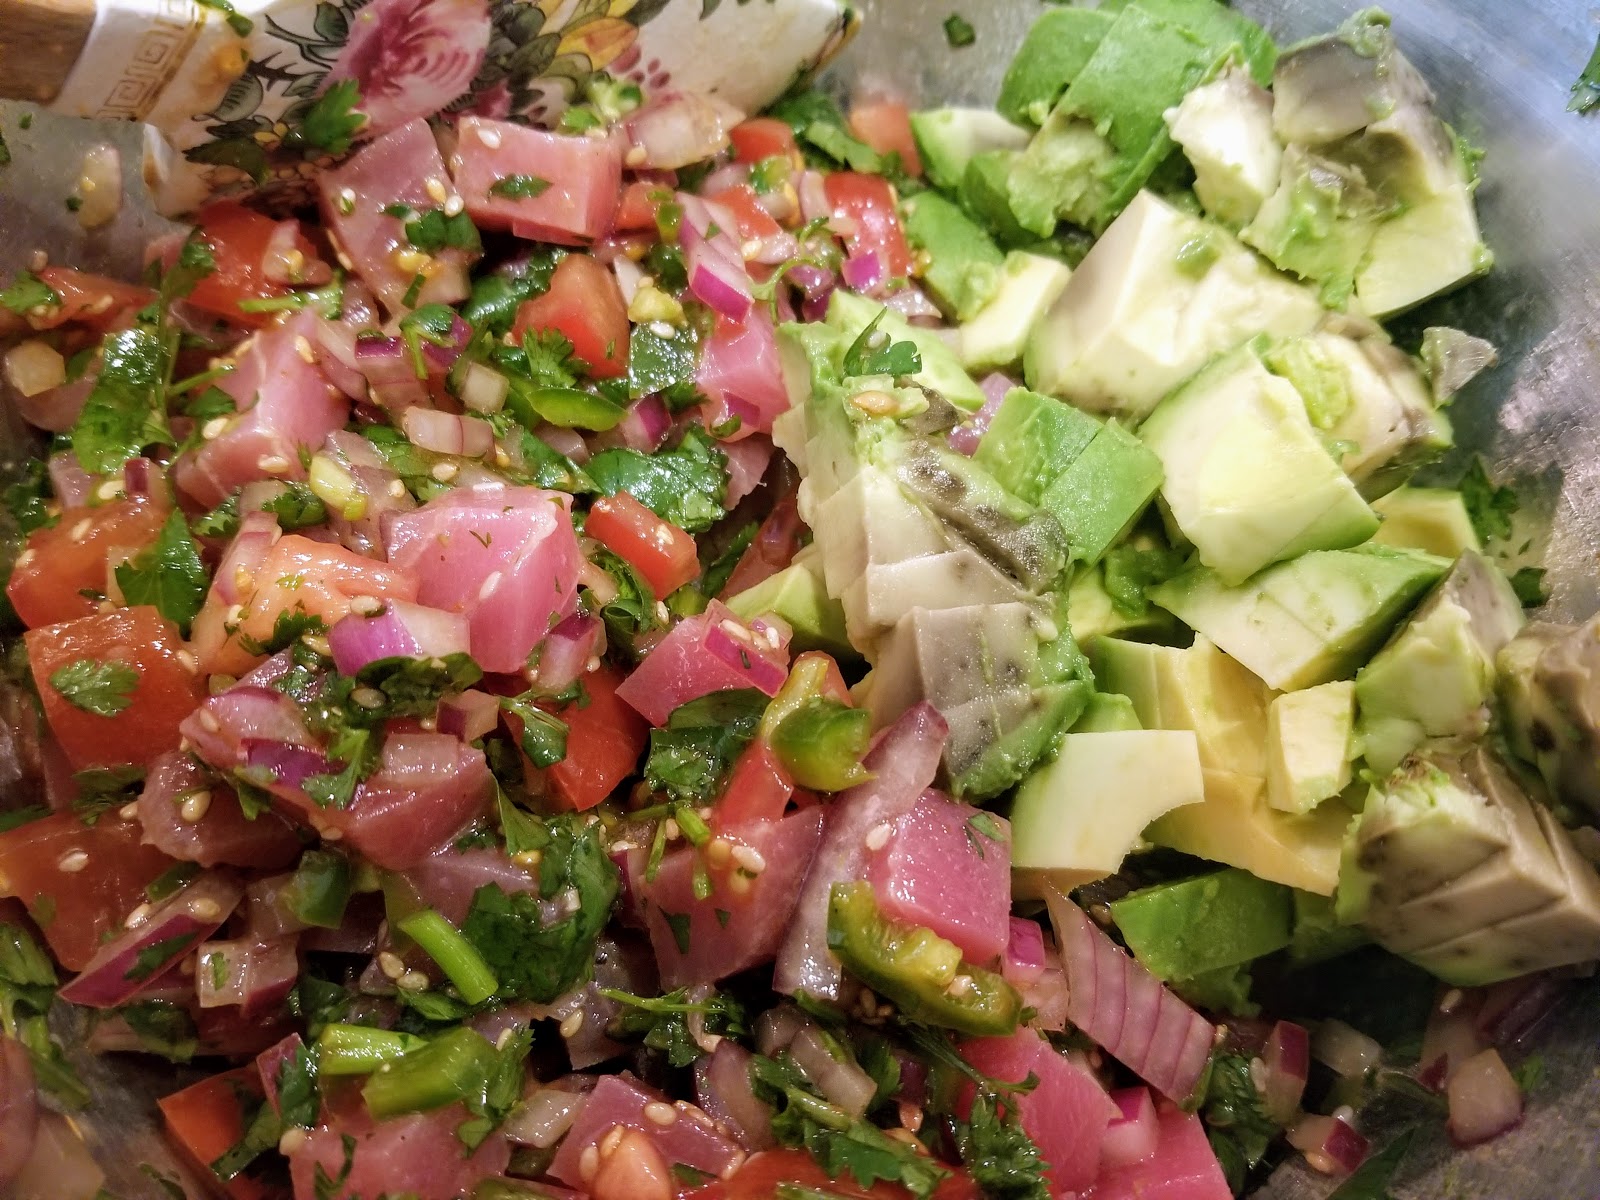
Ahi Tuna Ceviche (Gasundheit)!

Looking for a super healthy appetizer or lite-lunch that is super tasty?  Look no further... The next time you spot some nice raw Ahi-tuna steaks at your local mega-mart, grab some up and make Ceviche!


"Ceviche" is a fancy word that describes the process of "cooking" (curing) raw seafood with citric acid.  ...and you thought all I did was BBQ?!

You Will Need:

  • Olive Oil (1 heavy Tbsp)
  • The juice from 2 large limes
  • 1/3 cup red onion finely diced 
  • 1/2 bunch of cilantro, roughly chopped (small)
  • 1 Fresh jalapeno, diced
  • 1 tablespoon toasted sesame OR jalapeƱo seeds
  • 1/3 Cup Roma tomatoes, diced
  • 12oz of sushi grade Ahi tuna diced into small cubes
  • 1 avocado, diced
  • Soy Sauce, salt, and pepper
This recipe could NOT be any easier, just do the following in order!

Glop the olive oil into a nice clean medium-sized bowl.
Add the lime juice, and stir. 
Add the onions.
Add the Cilantro.
Add the Jalapenos.
Add the Seeds.
Add the tomatoes and GENTLY stir, stir, stir!
Now, get out your sharpest knife and carefully cut your Ahi-steak into 1/4" cubes.  Trust me, this is so much easier with a sharp knife.  If your "best knife" is that rusty old thing with the faded wooden handle that you've run through the dishwasher a thousand times, you're due for an upgrade!
Dump the tuna cubes into the bowl and gently fold them into the mix.
The Avocados are last because they're so fragile.  Slide them in and gently fold them into the mix.
Finally, shake on a fairly generous amount of soy sauce.  Taste it.  Use regular salt and pepper to do any "fine tuning" if necessary!
Serve this goodness on little brioche toasties, good crackers, chips, or just eat it with a spoon!!

Monday, August 19, 2019

Corn Casserole (or... "Crock Pot Corn Plop!")

What's better than Corn Casserole?  EASY Corn Casserole! 


Like most people, you probably have a can or two of creamed corn in your pantry.  Creamed corn in a can is NOT the most delicious thing in the world (on it's own).  If you want high quality creamed corn, there's a recipe for that and it's quite good if you make it from scratch.  So... let's take a moment to clean out your pantry a bit, and turn that stuff into something GOOD!

You Will Need:
  • 3 eggs
  • 2 (15-ounce) cans creamed corn
  • 5 Cups corn kernels (frozen or fresh, uncooked)
  • 2 boxes of Jiffy Corn Muffin mix (8.5oz each)
  • 1 Cup sour cream
  • 1/2 Cup cream cheese 
  • 1 Stick butter, melted
  • 1 Tbsp Creole Seasoning
  • 1 Tsp Crushed red pepper flakes (I like Chipotle flakes)
  • 1.5 Cups shredded cheese (mix some cheddar, jack, and/or other melting cheeses)
  • 1/4 Cup chopped roasted green chilies (Pueblo Dynamite or Hatch chilies are best)
I don't know how to ask this with any level of sensitivity so I'm just going to blurt it out; have you purchased condoms for your crock pot?  You should.  Goodness knows what that crock is doing while he's being stored under the cabinet for so many days between appearances!  Seriously, this recipe gets pretty sticky so you'll want a proper liner for your vessel!  I sprayed my liner with non-stick cooking spray, just to double down on making it easy to clean later.

Ok, get a big bowl out and get ready to corn!  First, drop in the eggs and beat the crap out of them.  Then add the creamed corn and stir some more.  Add the corn, stir and fold.  Add the boxes of Jiffy Mix.  Stir... Do NOT give me grief about my crazy paddle!  It's 2019 and paddles are completely gender-neutral!  This one identifies as a big burly dude, so... Anyway, stir in the corn, then the sour cream, and the cheeses.

Add the spices and the butter, then give it one more stir.  Set it aside while you go to work on the chilis.

Let's talk about chilies for a minute; If you buy a can of "green chilies" from the store, you'll get a flavorless mass of green chopped "goo."  Don't do it!  Get yourself some fresh roasted chilies that carry the balance of heat and flavor that you like the most.  Living here in Colorado, I'm lucky to have access to an array of chilies out of Pueblo.  I like the "Dynamite" chilies for their extra heat.  Simply roast them over the flame in your grill to get a nice char, then let them cool, and dice them up!  Using fresh chilies makes a world of difference in this dish, so make the effort!

Once you've stirred the chilies into the batter, scrape it all into your Crock Pot, and gently tamp it all down.  Add the lid and set it to LOW for 5-6 hours, or HIGH for 4 hours.  
This dish will cook from the outside in, so you will need to use the center as a guide.  When the center of the dish is "set" and edges are brown and crispy, it's time!!

Friday, June 28, 2019

Banana Cream Pudding Pie

I was introduced to this recipe by our neighborhood's Elder Stateswoman, Trish.  I'm not sure how to describe Trish.. I'm pretty sure she's 136 years old, but if she were to hear me say that, she'd pull the nearest switch from a tree and tan my hind-end with the strength of a 25 year old linebacker!  Then, she'd bend a knee and pray for my recovery!

She'll appear at your door with a batch of fresh made cinnamon rolls, just when you or your family seems to need it most and recently, after I returned from a doctor's appt, she appeared with an incredible banana pudding!  Naturally, being as full of love and respect for my elders as I tend to ever be... I stole her recipe to publish it here.  Please don't tell her!


This pudding tastes like pudding.  By that, I mean to say that it doesn't taste like the processed goo that's been stored for months in an air-tight plastic cup.  It's not good pudding, it's GREAT pudding and it takes a bit of work so... Let's do this!!

You Will Need:
  • Deep Dish Pie plate
  • For the Crust:
    • 2 Cups Nabisco 'Nilla Wafer Crumbs
    • 1/3 Cup Sugar
    • 1 Stick Butter
    • 2 or 3 Bananas
  • For the Pudding:
    • 3/4 Cup sugar
    • 1/3 Cup flour
    • 1/4 Tsp Salt
    • 2 Cups half-n-half
    • 3 Egg yolks (Beaten)
    • 2 Tbsp butter
    • 1 Tsp Vanilla extract
    • 2 Drops Banana extract (optional)
  • For the Cream:
    • 1 Pint Heavy Cream
    • 1/3 Cup powdered sugar
    • 1 Tsp Vanilla

This pie is big!  It's big in so many ways... Anyway, you'll need a big pie plate.  How big?  Deep!  If you're buying a new pie plate for this recipe (and really, what more of an excuse would you need?), it will be easy to compare them all and just grab the biggest one.  Mine was big enough, and it's 2" deep so... purchase accordingly.

Take a brand new box of 'Nilla Wafers and pour them all into your food processor.  Hit the "Pulse" button until you have a nice pile of crumbs.  Measure out 2 cups of them and then pour the rest into a tall glass.  Fill the remainder of the glass with cold milk and enjoy it as this recipe moves forward... you'll need the refreshment!  Add the sugar to your wafer-crumbs.  Melt the butter, and pour it into the mix.  Stir with a fork until all the crumbs are coated.


Dump the 'Nilla crumbly into your pie plate and use your fingers to spread it across the bottom and up the sides.  Push and press until it's all evenly distributed around the pie plate.  Now, slide it into a 375 degree oven for ten short minutes.  Pull it out and set it aside somewhere to cool down.  Slice the bananas and line them up across the bottom and sides of the 'Nilla crust.

Now, focus, take a deep breath, and get ready for the hard part!

The hard part (the pudding/filling) starts by combining the flour, sugar, and salt into a heavy saucepan.  Mix it together.  Add the half-n-half and stir to combine with a whisk.  When it's nice and uniform it will look like a pan full of milk.  Put the spurs to the heat and crank it up to Medium.  Keep stirring.  You'll get bored, and you'll be tempted to turn up the heat but; DO NOT DO IT!  Stay Medium, and keep stirring until the magic happens.  Drink some of your 'Nilla Milk to pass the time.

"What magic, Ken" you ask?  Well, after you've stirred forever and the heat builds, it will thicken.  "How thick?"  Well, "Primordial ooze" thick.  "Tar Pit" thick.  The pudding will start to burp and bubble.  Once it starts burping, stir for two minutes and take it off the heat.

Carefully dribble a spoonful of the hot pudding into the bowl where you've beaten your egg yolks and immediately stir it all vigorously.  You're "tempering" your egg yolks.  If you're familiar with tempering, then carry on... if not, then understand that what you're trying to accomplish here is to bring your egg yolks up to the temperature to match the pudding, without scrambling or cooking them!  When you've added a few spoonfuls of pudding to the eggs and stirred it all together, then dump the egg mix back into the pudding.  Use a rubber spatula to get it all.  Stir until the bubbling starts again, and go another two minutes.  The pudding will turn yellow and actually start to look like banana pudding!

After you've stirred for the final two minutes, dump in the butter, vanilla, and banana extract.  The banana extract is powerful stuff... You can omit if it you don't want to go "full banana!"  I find that a few drops adds just enough banana to the "nose" of the pudding, but not enough to smack you in the face with a tree full of bananas.  Stir in the extract and keep stirring until the butter is melted!

Gather strength, and take the pot over to your crust.  Slowly pour the mixture over the bananas.  Use a rubber spatula to get it all out, and then smooth it over.  It should be thick!  It should look like cake batter!  Spread a single layer of plastic wrap over the top so a "skin" won't form, and park this pie in the fridge to cool down for at least one hour!  Patience.....

To make the cream topping, simply pour the powdered sugar and the cream into a bowl and use a mixer to beat the ever-living crap out of, until it's thick whipped cream.  Add the vanilla.  Now, pull the pie out of the fridge (has it been an hour?  No cheating) and spread the cream across the top.  Easy-Peasy!

"How much cream?"  That's entirely up to you.  I put about 1/2 inch of cream over the top and I added a few small bananas to I could tell the difference between this true banana pudding pie and a coconut cream imposter!

"How good is this pie?" This pie is ridiculous, it's so good.  "Is it a pudding, or is it a pie?"  Well.. it's both!  If you can manage to extract a perfect triangular piece and put it neatly on a plate, then call it a "pie."  If your piece collapses into a joyous hunk of pudding, cream, and crumble, then call it "pudding!"  Either way, it's fantastic!

Friday, May 24, 2019

Chicken, Spinach, Artichoke, and Green Chili Lasagna


I have tremendous respect for the generations of Italian Grandmothers who pour their souls into the preparation and preservation of perfect Lasagnas!  My problem is (please don't hurt me), I'm not a real fan of traditional Italian Lasagna.  Don't get me wrong, I love the idea of a Lasagna... I mean, layers and layers of pasta, meat, gooey cheese, and creamy filling should appeal to just about anyone, right?  I just prefer a lighter one that's less heavy on the acid!


Here's a lighter Lasagna that pressed all of the right buttons for me; Chicken, Spinach, Artichokes, and Green Chilis.  Good, right?  Gimme!

You Will Need:

  • 1 lb. lasagna noodles (maybe less), cooked, drained, and ready to go
  • 3.5 tbsp. butter
  • 2 cloves garlic, minced
  • 3.5 tbsp. all-purpose flour
  • 2 c. Half and Half
  • 1.5 c. Whole Milk, (Diet Milk is "wrong")
  • 1 c. freshly grated Parmigiano Reggiano (The King of Cheeses)
  • 2 c. shredded rotisserie chicken
  • 1 frozen block of chopped spinach, thawed and squeezed dry
  • 1 can (14oz) artichoke hearts, drained and chopped
  • 4 large roasted green chilis, diced
  • 30oz of ricotta cheese (yes... 30!)
  • 4 c. shredded mozzarella

With apologies, I would like to submit that I had a LOT going on yesterday and my decision to assemble this dish should probably have been delayed.  To that end, I'm afraid I don't have any pictures of the process... but I'll do my best to describe everything!

First, preheat your oven to 350, then grab a large 6qt pot.  In the pot, melt the butter and toss in the garlic.  Sweat the garlic in the butter over low heat until the kitchen smells like someone's cooking lasagna!  Add the flour and stir together to make a roux.  Bring the heat up to medium and stir this roux for about 5 minutes.  Then bring the heat up to medium high and pour on the milk and half and half.  Stir until the mixture gets very thing and bubbles.  Don't let boil, because it's "jet engine" hot and sticky (like napalm)!

When the mix is good and think and bubbly, slowly add the Parm and stir it all in until it's melted.  Drop in the chicken, spinach, artichokes, and green chili.  Drop the heat to low and give it all a final stir, adding salt and pepper to taste.

Now, grab a 13x9 casserole pan and smear butter on the bottom or sides (or spray it with Pam).  Get a silicon spatula and start layering.  The layers described below are from the bottom-up in your pan.  For instance, Step 1 is the bottom layer that goes first in the pan:

  1. Spread a thin layer of the chicken mixture
  2. Lay down a layer of overlapping lasagna noodles
  3. Spread a thin layer of Ricotta cheese
  4. Spread another layer of chicken goop
  5. Sprinkle two cups of mozzeralla
  6. Another noodle layer
  7. Ricotta
  8. Chicken Goop
  9. Two cups of shredded mozzeralla

Use your spatula to gently press down and smooth over the final mix as best as you can.  Use a paper towel to clean the edges so it will look pretty when you take it out of the oven!  Put the lid on (or cover tightly with foil) and slide it into the oven for 45 minutes.

When time is up, remove the lid and slide it back into the oven to let the cheese on top develop a nice golden brown later of crispy bubbly goodness!  Pull it out of the oven and let it set, on the counter, for about 5 minutes.  This is difficult because you're hungry, I know, but it's important to let all of the layers sit together for a few minutes, so they won't ooze all over the pan when you finally cut into it... :)


Wednesday, May 8, 2019

Smoked Heritage Turkey (Southern Style)

Not too long ago, my friend Tammie asked me if I'd be interested in cooking one of the heritage turkeys that she had on her farm.  I JUMPED at the chance!!  A heritage turkey is a domestic turkey that has kept the historic characteristics that have been bred out of the majority of turkeys raised for consumption since the mid-20th century.


Modern domestic "Butterballs" have been fed, raised, and processed with genetically modified food, chemicals, and methods for generations now, and they barely even resemble their forefathers.  If you want to pump the brakes on this over-processed poultry, and want to try some honest-to-goodness "old school" bird, then pay attention!  This bird was delicious and it was packed with wholesale wholesome goodness, but there are a couple of things to be aware of if you want to get the most out of one when  you set it on your table!  Let's do this:

You Will Need:

  • For the Brine
    • 1.5 Gallons of clean water
    • 10lbs bag of ice
    • 3 Cups of Kosher Salt
    • 2 Cups of Brown Sugar
    • 3 Oranges, cut into chunks, squeezed into the brine, peel and all
    • 3 Tbsp Peppercorns
    • 3 Tbsp Chili Powder or Red Pepper Flakes
  • For the Bird
    • Olive Oil
    • Creole Seasoning

First things first, this turkey is NOT processed, injected with salt solution, brined, and frozen "for your convenience."  When you go to the farm to pick up your bird, there's a very good chance you'll find it hanging from a hook, freshly butchered, plucked, and ready for you to take over.  Forget about the giblets because these birds were raised on a farm with access to gravel, sand, and other "goodies" that they stuff into their gizzards that make human consumption impossible!  The rest of the bird, however, is a real treasure so when you arrive to pick up the bird, you should be ready!

What does that mean?  Well, it means you'll need a vessel to carry the bird in, and since it's fresh, you should be ready to cook it in the next day or so!  Therefore, mix all of the brine ingredients together in a pot on your stove.  Dissolve all of the salt and sugar, and let it simmer for 15 minutes or so, to wake up the orange peel and the spices.  Let it cool and pour it into a cooler with a good airtight lid!  Buy a 10lb bag of ice and head to the farm!

At the farm, grab the turkey and lay him (or her) directly into the cooler, and dump on your bag of ice!  The bird should be covered.  Close the lid, pay the farmer, give her a hug, and head back home.  Leave the bird in the brine right there in the cooler for 24 hours!  The ice will keep the bacteria away and the brine will season the bird.  You might want to check on it every 8 hours or so, and turn it, so that all of the parts stay submerged.

With the brining over, after 24 hours, it's time to prep and cook!


One word of caution before we begin... if you have any phobias or misgivings about touching raw poultry, you'd better get over it.  You're about to go full "butcher" on your turkey.  You're going to get gooey, bloody, and dirty.  It will all be OK, trust me!  You have soap and water and a sink, and it will all be over soon enough!  Now, muster up some courage.  Grab your shears, lay the bird, breast side down, onto a cutting board, and snip out the spine.  Take your time, and cut along both edges of the backbone.  You need strong fingers, so you may need some help with this part.

Now, while the turkey is still sitting with the breast side down, use your hands to flatten or "open" the turkey.  I like to remove the breast bone (or "keel" bone).  This is a thick bone that runs right down the middle of the turkey, between the breasts.  To remove it, you will need to use a filet knife to cut the breast meat away from it, and you'll need some strong fingers to pull it up and out.  Removal of the breast bone it not necessary, but it will make carving much easier, later.

Once the spine is out, the hard work is done.  Cut the "leg-thigh" quarters away from the breasts (this is easy since there are no bones to cut), and cut the wings off as well.  You should have:  one large "twin breast" section, two wings, a left leg-thigh quarter, and a right leg-thigh quarter.  Arrange them in a pan, starting with the breasts first (as shown).  The breasts, leg quarters, and wings should all fit into a large roasting pan like a jigsaw puzzle.  Rub all of the parts of the bird with a generous supply of Olive Oil, then sprinkle with some southern creole seasoning.


Now, set the pan aside and wash your hands, wrists, elbows, shears, your counter-top, and anything else you put your turkey-hands on!  Use soap, Clorox Wipes, and dry everything with a clean towel.  Take a deep breath, pour yourself a glass of wine and have a look at what you've done!  You've prepped a bird, restaurant style, in such a fashion that you'll be able to cook it in half the time, cover it with foil, transport it to your venue, and serve it to the amazement of your guests, all without getting a single other thing dirty!  Relax, the hard part is over!!


The rest is easy.  It's time to slow-cook this bird to perfection.  Jam a temperature probe into the deepest part of the thigh, and set the alarm for 170 degrees.  I put mine in a smoker (next to a ham, to keep it company), and I brought the heat up to 250 degrees.  Yes, TWO hundred fifty.  Why so low?  Well, you've dis-assembled the bird, so much more of the surface is exposed to the heat.  We don't want to blast the outside with so much heat that it begins to lose moisture.  Think more along the lines of "Crock Pot braising" and less "heat blasting."  This 22lb turkey was done in under 5 hours with the roasting temperature set to 250 degrees.

When it's done, pull it out and cover it tightly with foil to let it rest.  Allow 30-45 minutes for a good rest.  Carving is super-duper simple!  Just pull the legs up and they will fall away from the thigh all by themselves.  SUPER tasty!  Separate the breasts and cut them laterally.  Notice that there is a substantial layer of fat on a heritage bird!  IT WAS DELICIOUS and it keeps the meat super moist!  This turkey was entirely different than a "modern" store-bird.  How?  IT HAD FLAVOR!!  It was very rich, very moist, and like no other turkey I've baked, smoked, fried, or roasted!  My guests (14 of them) simply annihilated this turkey!  It was completely gone and eaten in under 20 minutes!  We didn't need gravy, we didn't need stuffing, and we didn't even need a knife!  The pieces just fell apart and couldn't have been any tastier!

"Skirted" Grilled Cheese Sandwich

Looks good, eh?  I wanted a grilled cheese sandwich, but I didn't want a "classic" grilled cheese sandwich.  What to do?


This is a short article, and it's really all about the method, more than the ingredients.  Want to turn your grilled cheese up to 11?  I give you the "Ten Steps to the Perfect Grilled Cheese Sandwich!"  Let's do it:

You Will Need:
  • A non-stick pan
  • 2 slices of your favorite bread (I used whole grain wheat)
  • 2 slices of American cheese
  • 1 handful of shredded colby-jack cheese
  • 1 Fresh Jalapeno, sliced
  • 1/2 stick of butter (softened)
  1. Place the pan on the burner, turn the burner to MEDIUM heat and melt 3/4 of the butter in the pan.  Toss in the jalapenos and let them sweat for awhile.  If you hear them "sizzle," the pan is too hot!  Let them soften and let the butter tame some of the heat in them.
  2. Meanwhile, place both slices of American cheese onto slice 1 of the bread.  Top with slice 2 and spread the rest of the butter on the top of slice 2.
  3. Top the butter with your handful of shredded cheese.  So, from the bottom up you should have: bread, 2x American cheese, bread, butter, shredded cheese.
  4. Move the Jalapeno slices to the outer edge and push as much of the melted butter back into the middle of the pan.  
  5. Carefully slide the sandwich off of a stiff spatula and into the pan.
  6. Leave the heat on Medium and WATCH YOUR SANDWICH!  Do NOT go anywhere!  Let the butter do its magic on the bread and let the bread toast and caramelize, but do NOT let it burn.  Lift the corner every so often to check it. 
  7. When it's GBD (Golden Brown, and Delicious), gird your loins and get ready for the fun part... in one swift motion, get the spatula under the sandwich, and quickly (but carefully), flip it over!! 
  8. The cheese that you liberally sprinkled on top should now be on the bottom, in direct contact with the pan.  You should be staring at the perfectly toasted "bottom" of the sandwich.
  9. Let the cheese on the bottom melt and spread out from under the sandwich a bit.  Let it caramelize and turn brown (not black).  You'll know when it's ready because your spatula will slide right under it.
  10. Flip the sandwich back over and onto a plate.  Cut in half  (if desired).