Friday, July 24, 2015

Smoked Prime-Rib Roast! (Wooo, Prime-Rib, YAY for Prime Rib!)

What is "Prime-Rib" anyway?  Well, first consider the awesome Ribeye steak.  Where did it come from?  If you follow a cow's ribs from the belly all the way up to the spine, you'll find a roast up there, clinging to that line of rib bones.  If you were to take that roast off of the bones and slice it laterally, you'd be cutting Ribeye steaks.  If you kept that roast whole, you'd have a "Rib-Roast."  If that Rib-Roast were graded as "Prime" by the USDA, you'd have a "Prime Rib Roast."  Cook that, slice it, and you'll be serving Prime Rib!

 
A whole Rib-Roast is an expensive piece of meat.  You can save a bit of $$ if you buy a "Choice" one (rather than Prime), and you'll save even more if you buy it from a warehouse store like Costco.  Either way, it's worth the cash, as long as you don't screw it up.  How do you do it right?

You Will Need:
  • 1 whole Rib-Roast (I bought a whole 7-bone roast, but you can ask the butcher to cut a 3 or 4-bone chunk if you don't need that much meat.
  • Olive Oil
  • All-Purpose BBQ Rub, or Montreal Steak Seasoning
  • Temperature Probe (REQUIRED)
For the Horseradish Cream & Mushroom Sauce (pictured below)
  • 1 Medium sized Vidallia Onion
  • 1.5lbs of sliced fresh mushrooms
  • 3 Cloves Garlic (crushed and diced)
  • Olive Oil
  • 3 Tbsp Cornstarch
  • 2 Cups Beef Broth
  • 6 Tbsp Prepared Horseradish (not the sauce, the pure horseradish)
  • 3/4 Cup Sour Cream
  • Fresh Ground Pepper
Let's begin.  Take it out of the cryo-vac pack and pat it dry with some paper towels.  Just look at it!  It's HUGE!"  I know... settle down.  If you look carefully at this picture, near the bottom-left part of the Ribeye that's staring you in the face, you'll see a golf-ball sized portion of meat, surrounded by a ring of fat.  See it?  That line of fat is where you need to insert your knife to cut down the length of the bones (unless you bought a boneless rib roast, then you can proceed past this part).

Flip the roast over, and start your cut at one end. If you follow the line of fat correctly, this should be a very easy cut to make.  Then, cut from the tips of the bones back toward the roast, so that a neat rectangle of meat and fat pulls away from the tips of the bones.  Save this!  Cut it into smaller squares and use it later to supplement your beef stew, chili, or whatever.

Now, notice that the bones are connected to each other with little squares of meat.  Cut these out as well.  This technique is called "Frenching" and it can take some time, depending on how cleanly you want to present your bones at the table.  I like to use dental floss (yes, floss) to literally floss them them clean.  Just wrap the floss around the base of the bone, grab the ends and PULL!

Once you've frenched the bones, take some cotton butcher's twine and tie some tight loops between the bones.  The roast will swell up a bit during the cooking and you'll want her to stay together, all nice and tight!  To prep the roast for the smoker, simply rub it down with Olive Oil, and shake on a good salt-based rub.  Montreal Steak Seasoning works very well, but I made my own rub with some Kosher Salt, Chipotle Chili Powder, Cracked Black Pepper, and a touch of Brown Sugar.  Use whatever you like but don't be shy!  This is a huge honking chunk of beef and it needs salt and spices!

Insert a digital probe thermometer so that the tip is in the center of the meat.  I prefer the method shown here, to the method of jamming the probe into the end of the roast.  Why?  Because I don't want to see a little hole in my steak later when I slice and serve!  Do you need a digital probe thermometer?  YES!  You just spent about $175 on a piece of meat.  Why risk ruining it over a $20 oven-safe digital thermometer?  Crazy.  Go get one!  Do NOT listen to your ego say, "You're a man, you will know when it's done when it's done" or whatever.  It's about the perfect piece of Prime Rib, not about your Neanderthal heritage.

Leave this roast on your counter-top until it comes up to room temperature.  Otherwise, you'll burn the outside before the inside is done properly.  When the inside of this roast hits 60 or higher, it's safe to start cooking.

I got my smoker running right at 250 degrees when I put this roast on.  I set the temperature alarm for 125.  The alarm went off exactly 3 hours and 37 minutes later.  Will that amount of time work for your roast?  Maybe... The only way to know for SURE is with your thermometer.  When it touches 125, pull it out of the smoker and wrap it in 2 or 3 layers of tinfoil and then place it in the bottom of a good cooler.  Close the lid.  Let it rest in there for at least 45 minutes.  The temperature will clime another 10 degrees, in fact, mine climbed up to 138 before it was finished resting.  138 is the perfect Medium Rare.

After the rest, I sliced her open.  Hallelujah, Saints be praised!  She's a perfect medium rare!  And look, someone left a bottle of Basil Hayden Bourbon on my cutting board!  How'd that get there?

All that's left now is to slice the portions (I like one bone per portion) and serve it with a nice horseradish cream sauce.  Maybe with some mushrooms??

OH... wait; did someone say "Sauce?"  Here's my sauce recipe:

  1. In the biggest saute or frying pan you have, saute the onion (diced) with the garlic until the onions are clear.
  2. While the saute is going, mix the cornstarch with 1.5 cups of cold beef broth.  Why cold?  It's the only way you'll get the corn starch to mix well without clumping.  Use a whisk and beat the crap out of it.
  3. Stir the broth into the saute and add the horseradish.
  4. Add the mushrooms.
  5. Cook and stir over medium-high heat until the mushrooms cook down and the liquid reduces and thickens.
  6. Kill the heat and stir in the sour cream.
  7. Finish with several grinds of fresh pepper.

Monday, July 6, 2015

Sweet & Spicy Smoked Hunks of Bacon!

Bacon, as most of us know, comes from pork bellies.  As you can probably imagine, they process thousands of bellies at the bacon factory.  During this processing, there are many ends, pieces, and stray hunks of bacon that fall by the wayside.  Well, some angel sent from heaven grabbed the floor manager and implored him, "PLEASE, if we collect and save all of these stray hunks of bacon, we could SELL them at a discount!"  Thanks to that wonderful angel, we can now find this at the store:


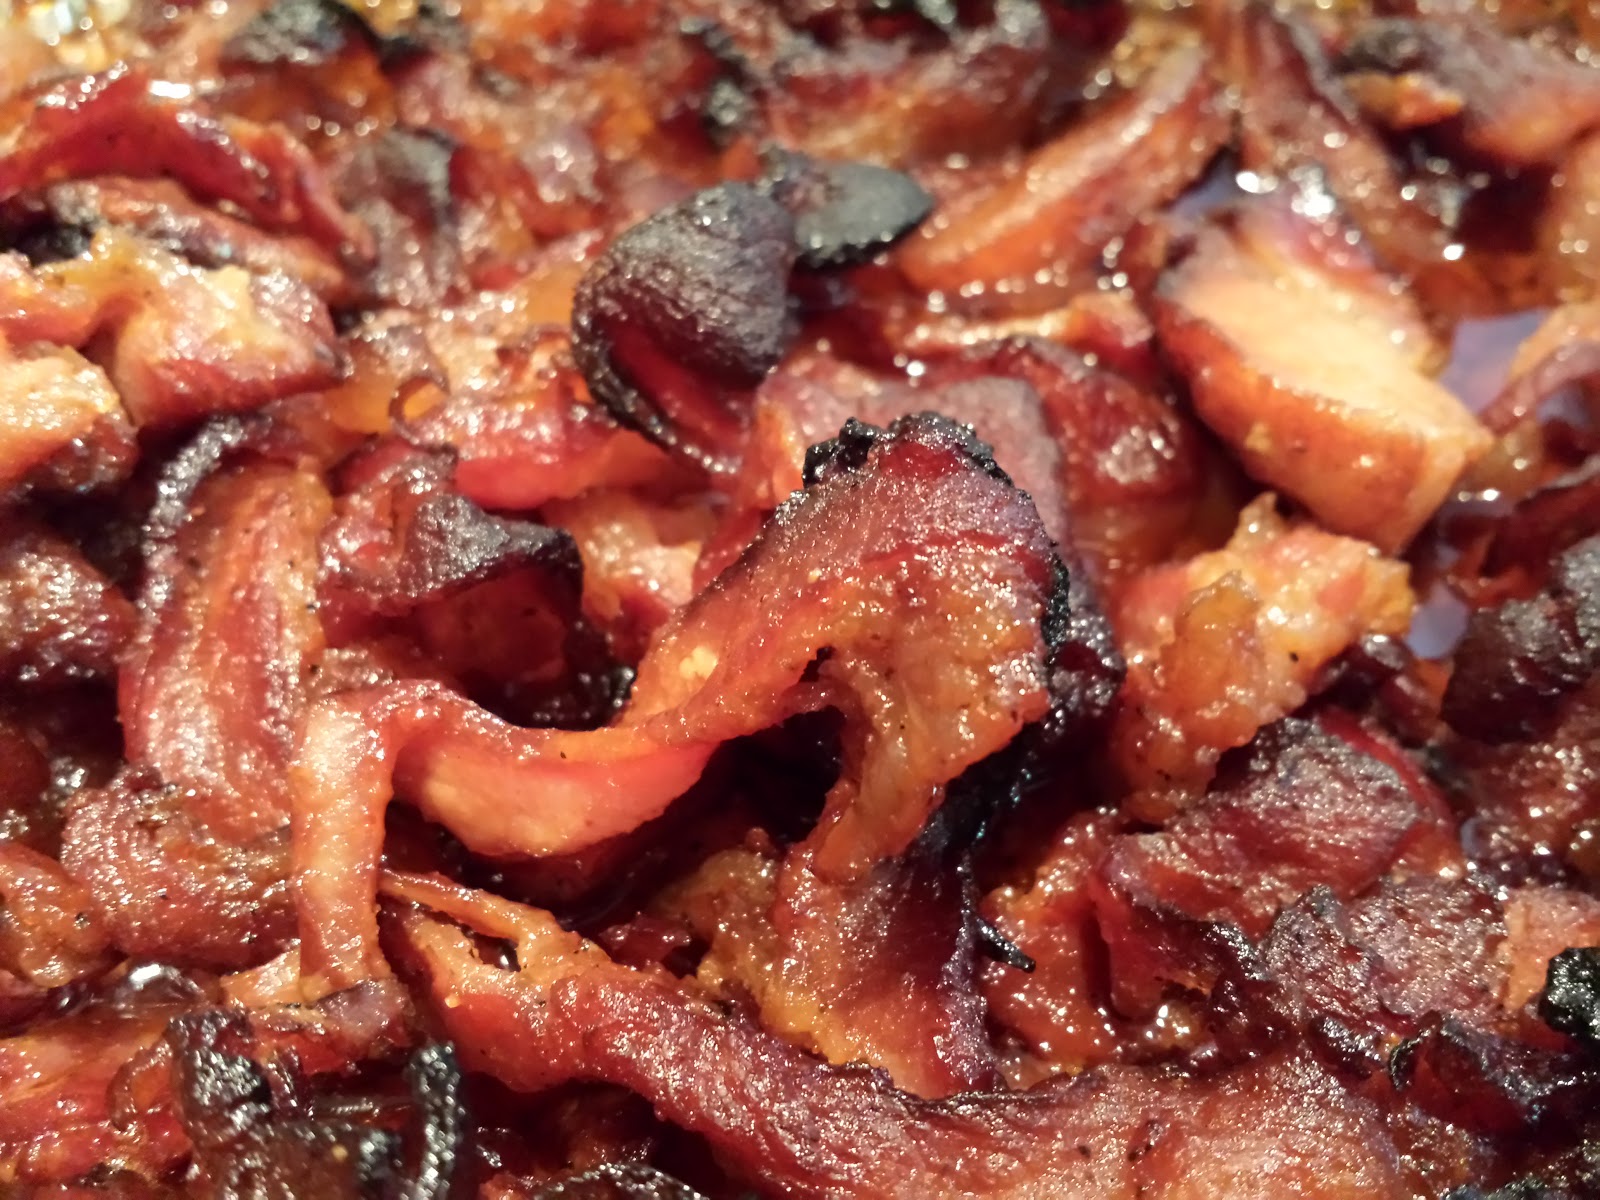
With a tiny bit of work, you can turn that... into THIS!!  How does a big pan-load of thick hunks of bacon, flavored with maple, brown sugar, agave, and spicy Chipotle goodness sound?
Don't we all want that?

You will need:
  • 3lbs of Bacon ends, pieces, and random hunks
  • 3/4 cup dark brown sugar
  • Generous "burp" of pure Maple Syrup
  • Generous "burp" of Agave Syrup
  • 2 Tsp fresh ground Black Pepper
  • 3 Tsp fresh Chipotle Chili Powder
  • Generous squirt of your favorite BBQ Sauce
Open the package of bacon and dump onto your cutting board and give it a look.  You'll see all kinds of bacony goodness.  Thick strands, lean pieces, Marbled hunks of fat... it's all good!  Use a sharp filet knife to cut everything into oversized bites.  Bacon shrinks a little when you cook it, so be sure to cut things down to a size that might be slightly larger than you'd be comfortable shoving into your mouth (like that's possible).

When everything is cut to fairly uniform hunks, dump them into a foil "half pan" where you'll add the "yum".  Take off your wedding ring and remove any other jewelry from your hands, because things are about to get messy...

Sprinkle on the brown sugar, then add the rest of the ingredients.  If you can't find Agave syrup at the store, don't fret, just use a bit more Maple syrup.  Agave syrup is derived from the same Agave cactus plants that give us Tequila!  "Tequila and bacon," you say?  Hell yes!  Actually, Agave syrup doesn't taste like Tequila at all, it caries a fairly complex yet very sweet flavor though, so it's worth looking for at the store.  Most of the world's Agave plants live in Mexico, hence you'll probably find it in the "Mexican Food" section.

Now, get your hands in there and get messy!  Squeeze, mix, swirl, turn over, spread, and pinch everything together until you feel the brown sugar dissolving, and you have a big pan full of awesome bacony wonder that looks like this:

Wash your bacony hands.  Wash them twice, and be sure to clean under your nails because day-old bacon that you smell under nails in the morning is about as bad as bacon can be... slip the pan onto your smoker, to the right of the pork shoulder that you just wrapped.  If you don't have a pork shoulder, it's ok.  I happened to have one when I took the picture (it was delicious).

Close the lid to your smoker and run the temp at 225 degrees for two more hours.  The whole back yard will smell like BBQ and Bacon, it's pretty remarkable.  Your neighbors will start sniffing around... tell them to "Go away!" (unless they bring beer offerings).  When the bacon is done, it will look like this!  It doesn't get any better than this...


These are amazing on just about any sammich, or just popped into your mouth.  You can also chop them up and sprinkle them into salads, on top of baked potatoes, or over freshly grilled shrimp with garlic butter sauce.

NOTE:  Somebody already asked me, "Can I do these in the oven if I don't have a smoker?"  I suppose.  Just put them into the oven at 375 for about 45 minutes.  They'll still be good, just not as "smokey."  This is exactly the kind of thing you can use to justify the purchase of a smoker in the future though... "But, but, honey-pookums, wouldn't you enjoy some SMOKED bacon, hmm?"

Tuesday, June 30, 2015

The Ultimate BBQ Breakfast Sandwich; and Tips on Sunny-Side Eggs!

It's rare that I ever have leftover pulled pork in the fridge.  Most of the time, I'm delivering pork to a customer or I'm hosting enough people at my own house to devour it all.  So, when I found a zip-top bag full of the porcine goodness one early Saturday morning, I invented this sandwich (or "Sammich" as I like to say):

Imagine the yolk oozing into the pork juices, and the toasted baguette soaking it all in.  Feel the crunch of the edge of the egg white and the crispy edges of the bark from the pulled pork as they mingle together in your mouth... yes, this; THIS was a good sammich!

You will need:

  • A generous plug of pulled pork
  • An egg (sunny-side up)
  • Some good bread (Ciabatta, or French Baguette rolls work well)
This sammich is easy.  Well; I mean, if you've already invested 8-12 hours slow-smoking your pork shoulder, the rest is easy!  Toast the inside of your sammich bread.  My toaster has a "Bagel" setting that I use to toast only what will become the inside surface of the bread.  Butter both sides when they come out of the toaster.  Warm up your pork, and portion a hunk onto the bottom of the sammich.  While the bottom of the sammich starts to absorb the pork fat, turn your attention to the egg.


Runny yolks freak some people out.  This sammich is not for those people!  While the FDA would like nothing better than to snatch this egg right out of your hand for merely THINKING about eating the yolk raw, I plan to take my chances.  If you're super freaked-out, you an always buy pasteurized eggs or you could cook it a little more.  I HIGHLY recommend a runny yolk though, as it's flavor really enhances the pork.  The first step to the perfect sunny-side egg is a good egg pan.

Eggs are sneaky.  if there's a burr or a hot-spot in your pan, the egg will find it, stick to it, and make your life difficult.  This is why I have an "Egg Pan!"  This is a high quality, heavy, anodized aluminum pan with a good non-stick surface and a tight fitting lid.  When you buy this pan, you'll need to declare to your family, your household, your neighborhood, and your entire kingdom that this amazing piece of kitchen hardware is your "Egg Pan!"  It will cook nothing but eggs, omelets, and possibly bacon.  Nothing will touch it but silicon spatulas and wooden spoons!

Heat up your egg pan on high heat, and toss in just a small dab of butter.  When the butter sizzles, slowly and carefully ease your egg(s) into the pan.  Immediately reduce the head to medium.  Be patient, resist the urge to slide the eggs around.  Once the bottoms turn white, add about a teaspoon of water to the pan and put on the lid to trap the steam.  The steam will cook the albumen (the gooey part of the egg right under the yolk).  With some gentle prodding, you can "pop" the eggs loose and slide them around your pan.  I like a crispy edge!

Slide the egg right out of the pan and onto your sammich.  Don't worry if you break the yolk during the process, you'll break it anyway once you take your first bite.  If you've done this correctly, the top bun will soak in some yolk while the bottom bun soaks in some pork fat,  When you bite into the sammich, you'll feel some crunch from the toasted surface, the edge of the egg, and the bark on the pork.  Your tongue will be coated with egg yolk and pork fat while your teeth pull that glorious pork apart and mix it all together!  Mmm MMM, Sho' am good!


Monday, May 4, 2015

Key Lime Pie Conundrum


Key Lime Pie is probably most dangerous of all the pies.  There are pie snobs out there who would dare take a bite of a Key Lime pie and declare, "That's not really Key Lime Pie."  This is akin to returning home to TX from your vacation in the Carolinas and declaring that "This isn't real BBQ!"  You might get your hat handed to you... with your head in it!


The problem is the limes.  The Florida Keys are home to those tiny mini-superball sized limes.  Those limes are as valuable to the locals as pearls when it comes to pie!  When they're in season, they're almost as sweet as they are sour and you don't have to be a pastry chef to tell the difference between them and a regular hand-sized lime (which are probably from Mexico).

If you want to make a Mexican Lime pie, be my guest!  It will be good, but it won't "sell" as a Key Lime Pie, that's for sure.

You will Need:

CRUST
  • 1.5 Cups of crushed graham crackers.  That's about 16 crackers.  I use half cinnamon crackers, half regular, and a food processor to "Crumb" them
  • 3 Tbsp granulated sugar
  • 1 whole melted stick of unsalted butter

PIE FILLING
  • 4 large egg yolks
  • 1 can (14 oz) sweetened condensed milk
  • 1/2 Cup FRESH KEY LIME JUICE (approximately 12-16 key limes, so get to squeezin'), strained (no seeds or pulp skins)
  • 2 tsp lime zest
 WHIPPING CREAM FOR GARNISH (OPTIONAL)
  • 1/2 c heavy whipping cream
  • 2 Tbsp granulated sugar
  • 1/4 tsp pure vanilla extract

Instructions:


CRUST:
  1. Preheat your oven to 350 degrees F
  2. Mix the ingredients together with a fork and press them into a 9 inch pie plate
  3. Bake in oven in middle rack for 10-12 minutes until lightly browned
  4. Remove from oven, and cool on rack, leave the oven on at 350
PIE FILLING:
  1. In a stand mixer with the whipping attachment, beat the egg yolks on medium speed until they are thick and turn dark yellow.
  2. Turn the mixer off and add the sweetened condensed milk.  Now, turn the mixer speed to low and drizzle in 1/2 of the lime juice.  Once the lime juice is incorporated, add the other half of the juice, keep mixing while slowly ramping up the speed, until the mixture is completely smooth.
  3. Toss in the Zest, but mix it in with a fork, by hand, so the paddle attachment (or beaters) won't pick them out.
  4. Pour the custard mixture into the pie shell and bake at 350 degrees F for 12 minutes to set the yolks.
  5. Remove from oven and cool to room temperature and then refrigerate for approximately 2 hours to set.
WHIPPING CREAM (Optional... some Key Lime purist will skip this step):

In a stainless steel medium bowl, combine whipping cream, sugar and vanilla and whisk by hand until creamy peaks form.  Smooth the whipping cream evenly over the top of the pie.  Garnish with a slice of key lime.


Monday, March 9, 2015

The Guacamole Method

Great guacamole comes from great ingredients, to be sure, but there's also a method to the madness!  Follow these instructions and they'll take you down a path to guacamole heaven, I promise!

You Will Need:
  • 8 Avocados, soft to the touch
  • Juice of 1/2 Mexican Lime (the "big" ones)
  • 4 Large Roma Tomatoes (Yes, Roma.  No subs)
  • 1 Medium Red onion (finely diced)
  • 1 "Bunch" Cilantro (Remove the bottom "inch" of stems, finely dice the rest)
  • 6 Peeled Garlic Cloves, beaten to a paste
  • 2 Jalapeno Chilis
  • 2 Tbsp Tony Chachere's Creole Seasoning
  • Salt & Pepper
When most people make guacamole, they're tempted to chuck all of the ingredients into a bowl and then beat the holy smokes out of it until it's a smooth green paste.  Do NOT do this, no matter how sorely you're tempted.  There's a method to the madness here, and for good reason.

Before you start, get a couple of bowls ready, along with a big cutting board.  Sharpen your knives.  You want your prep-station to flow with you.  Use one bowl for trash (onion skin, avocado pits, etc) and one for your guacamole.  Assemble all of the product prior to getting started.  The goal is to plant your feet firmly and to work through it, concentrating on textures and methods, and not running around the kitchen looking for stuff.

Begin with the garlic. I like to use a Molcajete (Mole-cah-HET'-tay) to smash the ever-loving bejeezus out of my garlic cloves.  Pummel them into pulp so you can squeeze ALL of the flavor out of these little buds.  Pound, beat, or smash them until you need a spoon to scoop them up and put them in your bowl.

Now, for the avocados!  You want an avocado that feels heavy for its size.  The skin is tight to the pulp in the middle, and nothing feels "loose."  If you squeeze it with your finger-tips, you should easily be able to leave an dimple in it.  If the avocados are too hard or too mushy, forget the whole idea and find another market to buy the good stuff, or leave the hard ones in a paper bag for a few days until they properly ripen.  Pop the little bud-stem out of the end (nobody wants to eat those) and then slice it open and remove the seed.  Scoop the green goodness out and into the bowl, on top of the garlic.

Now, time to mash and stir.  Use a potato masher and press through all of the stuff, squeezing it through the steel of your masher.  Once you've smashed each orb at least once, get a big paddle or spoon and vigorously stir it a few times, until it's uniform in color but still a little "chunky."  Add the lime juice and stir it in well.


You don't want a smooth paste here, we're not looking for a sandwich spread, we're looking for a "salad," right?  Check the picture on the right.  Pea-sized chucks of avocado are still around, and this is a good thing!

Now, chop the entire "bundle" of cilantro into a fine dice and add it to the top.  Stir, stir, stir some more.  Keep the chunks alive, but integrate the cilantro deep into the salad.  Do NOT taste this yet!  You won't learn anything and we have a long way to go!


Once you've stirred in the Cilantro, dice and add the Jalapenos.  Add one now, and save the other for fine-tuning, later.  Go ahead and add the Creole Seasoning.  I know, Guacamole isn't "Creole," it's from Mexico.  Still, Tony Chachere's has EXACTLY what Guacamole needs to become a world mega-star, so do it.  Stir it in and give it a little taste.  It should be "almost a bit too salty, but not quite so."  We still have onions and tomatoes to add, so.. don't spend too much time fine-tuning anything.  We'll have time for that, later.

Dice the onion into the smallest bits you can, and add them to the salad in the bowl.  NOW, do NOT "stir" this like crazy.  It's time to FOLD the salad over and on top of itself.  You don't want to tear and bruise the onions, they give the salad a nice little "crunch" so you want to keep their integrity!  Gently fold the salad over and over until the onions almost "disappear" into the mix.

Dice and add the tomatoes.  Again, you don't want to crush them, they look better, and they add so much to the "bite" of the salad if they're left as little cubes.  You're using Roma tomatoes here, which are very firm and should hold together well.  Gently fold the tomatoes into the salad.  Sing gentle lullabies to the guac during this phase, it will help calm everyone down... think gentle thoughts...

Ok, NOW we're ready to taste and fine tune this beautiful salad into the Hall of Fame rock-star it was born to be!  Taste it.  You might want some more heat.  If so, dice the other Jalapeno and toss it in.  You might want some more salt and/or pepper.  If so, go ahead and pinch some in, but be careful!  Remember, you'll probably eat this with chips, and chips are salty, so don't over-do it!

This makes a BIG bowl of guacamole!  You can see my latest batch here, with a run of homemade salsa (we had "Taco Night" with all of the neighbors).

If you have guacamole leftover, be sure to store it with a layer of plastic-wrap pressed down over the top of the surface, to keep it fresh and "Green!"  Be sure to press as much of the air out as possible!  Snap on a lid and drop it into the fridge.  It should say fresh, green, and delicious for 3-5 days.

Wednesday, January 28, 2015

Homemade Pastrami (Smoked Corned Beef)

So, you've been watching the Food Network channel again, and you're shaking your head at why, on God's earth, anyone would take the time to cut a whole-untrimmed brisket out of a cow, brine/cure it, de-salinate it, then spend 24 hours spicing and smoking it!?  I'll tell you why they do it... because it is FREAKING DELICIOUS and it is the best homemade pastrami you or your friends will ever eat! 


You will need:
  • 1 whole, untrimmed, corned beef brisket
  • 1 Cup of Pastrami Rub
    • 1/4 cup of cracked black pepper
    • 1/4 cup of smoked paprika
    • 1/4 cup of brown sugar
    • 1/4 cup of Chili Powder
  • 1 Smoker (with lots of wood (I used Mesquite))
All pastrami starts with corned beef, and all corned beef starts with a brisket.  If you want to start with a regular brisket and pickle it yourself in a brine with caraway seeds, salt, and other spices, be my guest.  You'll have homemade "Corned Beef."  Personally, I find it to be a long and rather tedious process (thus, I buy them already corned).
 
Sadly, most stores only sell the corned beef "Flat" and not the whole brisket.  If that's all you can find, it will work but it won't be quite as juicy because you'll be missing most of the fat cap and other marvelous parts of the whole brisket.  Google around and see if you can find one.  Don't buy anything with the word "cut" in the label.  For heaven's-sakes, you don't want one that's already sliced!  That's YOUR job!

I source my corned beef from Restaurant Depot.  You can see here, I found one that weighed a ridiculous 26lbs!  It was 27 inches long and just a "Brute!"  I joked with some "Big Green Egg" smoker users that it would not fit on a 24" XL egg.  They all got defensive and scolded me, "Oh yeah?  Well it would fit on mine, I know it would!"  Ok, if you can fit a 27" peg into a 24" hole, I'd love to see it.  Big Green Egg people are so crazy, but I digress...

Take your corned beef brisket out of its packaging and drain the ooze.  Slide it right into a bucket of cold water, and stash the buck into the fridge.  Why?  Salt!  Corned beef is brined/cured and loaded with salt.  When you put this thing onto the smoker, you'll be rendering fat and moisture out of it and thus, concentrating the salt.  Trust me, taking some of the salty brine back out of this beast before smoking is critical.  I soak it for an hour per pound which means, 26 hours for me!  Change the water out with fresh ice water every couple of hours because the salt that leaches out will end up in the water and you'll want to flush it way every now and then.

After the soaking, lay it out onto a stable work surface and notice that you won't seem to stop it from oozing water!  Yes, it's water-logged... just keep pressing and dabbing with paper towels until you get the water out.  You'll be left with a giant pink slab of corned, de-salinated brisket that looks very sad.  Do NOT stop at this point and think, "What have I done?  This can't possibly ever taste good, I mean, just LOOK at it!"  Settle down, it will be OK!

Mix up your rub and get to spreading it all over.  Press the rub as deep as you can into the cracks, crevasses, folds, etc.  Rub and press, press and rub, sip an adult beverage and remind yourself that very few people in the world are dedicated enough to take three days to cook a piece of meat!  Those people are NOT "Crazy," they are respected and revered as "Culinary Beasts!"

Now, wrap the entire thing in a cocoon of plastic wrap, and leave it out on the counter to rest it up to room temperature (at least 4 hours, no more than 12). If your brisket is as big as mine was, you may need a buddy to help you flip and turn it while you wrap it up tightly.  Wrap it tightly enough so that it doesn't leak or that the dogs won't sniff it out!

Ok, several hours later, the rub should have melted into the meat, and it should all be up to room temperature.  Get your smoker ready!  Remember, you're looking for a thin blue wisp of smoke out of the stack (Nearer of the two smokers in this picture), NOT a thick white billowy "Summon a new Pope" kind of smoke (Farther of the two)!

Pre-heat your smoker to 225 degrees and when you have good smoke, a good bed of coals, and the temperature is right, lay the beast onto the bed of your cooking chamber.

Here comes the hard part... Keep in cooking/smoking at 225 for an hour per pound.  For me, that was 26 hours!  If everything comes together as it should, the internal temperature of the brisket should be touching 200 degrees at that time.

The brisket won't take any additional smoke after about 12 hours so if you want to wrap it in foil, and bring it into the house and into your oven at 225 for the other 12 hours, that works just fine!  Keep a temperature probe inserted and keep an eye on it.  It will "Stall" at 165 for awhile but just wait it out... Once it melts away the connective tissues, it will continue to rise!

When it hits 200, it will be done and it will need to "Rest" for 45 minutes or so.  Just take it out of the cooking chamber, cover it with foil and let it sit all by itself.  I know, I know, it looks like a giant black lump of coal... just wait!

After it's done resting, take a deep breath!  You've worked hard for this moment!  You've soaked, rubbed, rested, and smoked this damn thing for hours and hours!


Start slicing against the grain and behold, you'll have a dark red, fall-apart hunk of homemade pastrami!  Wow, is it ever good!  You've had a Reuben sandwich, right?  It's time to build Reuben's hot cousin; "Rachael!"  Get some think pumpernickel bread, smear on some dressing, a bit of kraut, and then heap on some pastrami while it's still hot... There's no better sandwich in the world!!

Monday, January 26, 2015

"Reverse Searing" - Cooking Steaks Backwards for More Flavor!

Traditionally, cooks prepare their steaks by searing them first over high heat, then baking them in an oven (or in a grill) to develop the inside of the steak to their desired doneness.  Some cooks are reversing this process and they're achieving magnificent results!  Cooking the steak very slowly to the desired doneness first, and THEN grilling a nice crust on it makes for a much larger section of "Medium-Rare" (or whatever you prefer) in the middle, and for a much nicer crust on the exterior, since the steak is already warm when it ultimately hits the fireHave a look at this Filet!  I mean... how "Yum" is this:


You will need:
  • 1 Thick Steak (2" or so should do it)
  • A Grill with direct and indirect surface cooking
  • Seasoning
I started with three beautiful Filet medallions.  I seasoned them on both sides and then I used some of those cool new food-grade silicon rubber-bands to snap some thick slices of bacon around them.  Aren't they cute?  Let these sit, unmolested, on the counter until they come up to room temperature.  While this is happening, it's a good time to pour yourself a nice beverage before going outside to build a fire in your grill.

In this picture, you can see my adult beverage as we patiently wait for the cooking chamber of my smoker to reach 275 degrees.  The fire is lit, the steel is heating up and we're well on our way to 275.  The idea here is to "bake" the steaks at a low temperature until they reach your desired doneness.  In my case, that means Medium Rare and 125 degrees. 

When your cooking chamber (Grill, Smoker, Oven, whatever) hits 275 degrees, lay in your steaks and jab a temperature probe into the center of one, so you'll know exactly when it hits your target temp.  This isn't very exciting.  I mean, you won't hear that satisfying "sizzle" when you lay the steaks on.  Also, it could take up to 45 minutes or an hour for the steaks to reach 125 on the inside.  Discuss time management philosophies with your beverage and wait it out.  Your patience will be rewarded!

Once your steaks hit their target temperature (125 for me), take them off the heat and let them rest (covered with foil) for about ten minutes.  Then, lay them over the hot fire!  Now they will sizzle!  Grill them over hot fire for at least a minute per side, but not for more than 90 seconds.  Disregard the salmon on the indirect side of the grill in this picture... I had a guest who preferred salmon to steak (go figure).


When the steaks come off after the sear, they should have a nice crust on them, and since they were already rested, they should be ready to slice and serve immediately.  Note the juice, the moisture, the perfect level of doneness, the crust... additionally, there was an infusion of a smokey flavor that you wouldn't ordinarily get with a traditional grilling method.

"Reverse Searing" may not be for everyone, but I encourage you to try it at least once.  Ribeye, Filet, and NY Strips are all excellent candidates for a reverse sear.  I know I enjoyed mine a LOT!